Performance testing is sort of testing expected to decide the responsiveness, throughout, dependability, and additionally adaptability of a framework under a given outstanding load or whether the expected performance is met or not under the actual conditions of use.
In the software, the dynamic response always returns the different data for each iterative request and this may affect the subsequent request as well. Now correlation is used to extract the dynamic values from the response stored in the variable and use it on subsequent requests.
JMeter does not provide access to use the auto-correlation like in other performance testing tools i.e. LoadRunner etc. If correlation does not handle correctly then it is worthless. Sometimes, performance testers manually add the correlation in the test plan and add the values to be replaced in subsequent requests. Simply, there are two steps involved in performing the correlation.
- Extracting the dynamic values from the response of step 1. Now from a testing point of view, it is necessary to identify which response is dynamic and which is static. Typically every HTTP web performance test involves the data correlation. You can ignore the correlation if you are performing on the static pages like some homepages and contact pages. In another case, you can’t stop using correlation.
- The next step is to take the reference of the particular extracted value in the request of the next step.

It is also called dynamic referencing performed in the runtime environment.
Why it is required:
In a test, there may need to reference values from earlier steps which cannot be determined prior to the test execution as these are generated at runtime.
Example:
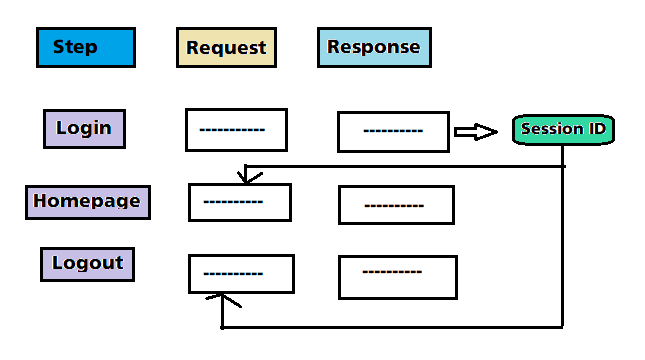
In case we built any particular test plan, we will have certain steps, request, and response for that test plan. Now if you use any server or website, there you will have the login page, homepage, and log out or many other activities inside that particular website. So once you login to that particular webpage, a session id is generated, So when you want to move around into any subsequent request of that particular website you would need that particular session-id to carry forward so that you can continue working with the website until you log out. The session id is basically the dynamic response from step 1 that can be further used in step 2 and so on.
 How to use regular expression extractor:
Now in Jmeter to perform the correlation, you would need this regular expression extractor, there are certain steps that you need to follow.
- Create a test plan in JMeter.
- Add regular expression extractor inside your JMeter.
- Then, you have to refer to your extracted value in the next step.
- Finally, run and validate the test.
Steps to correlate the dynamic values using Post-Processor:
- The first step is to create a test plan then create a new thread group.
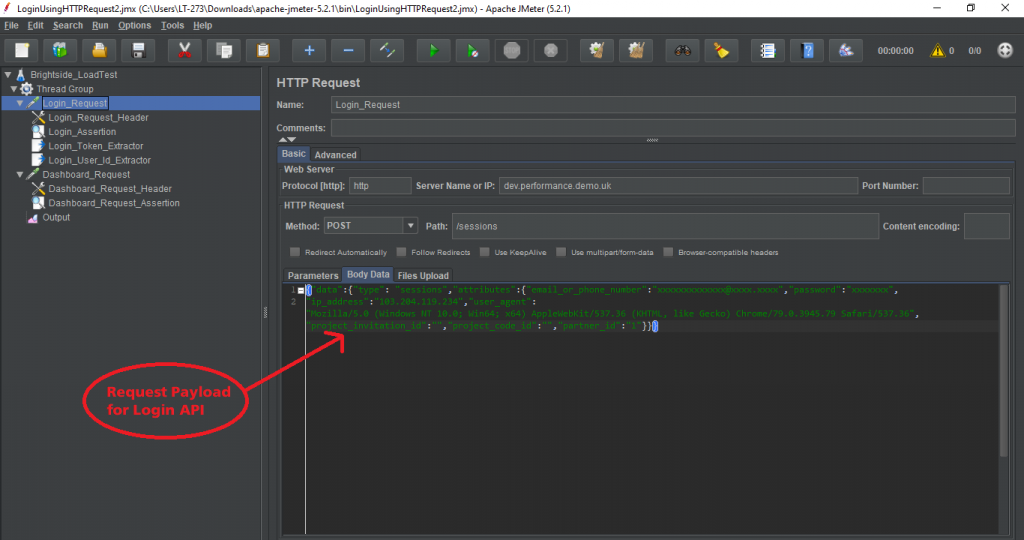
- Once added to the thread group, the next step is to add the sampler for HTTP Request step 1. You just need to add the server name or the IP of any particular website for which you are checking the performance. You need to add the request payload in the Login HTTP Request.
- Add the request headers in the HTTP Header Manager inside the login request step 1.
- Now add the listener and save the test plan.
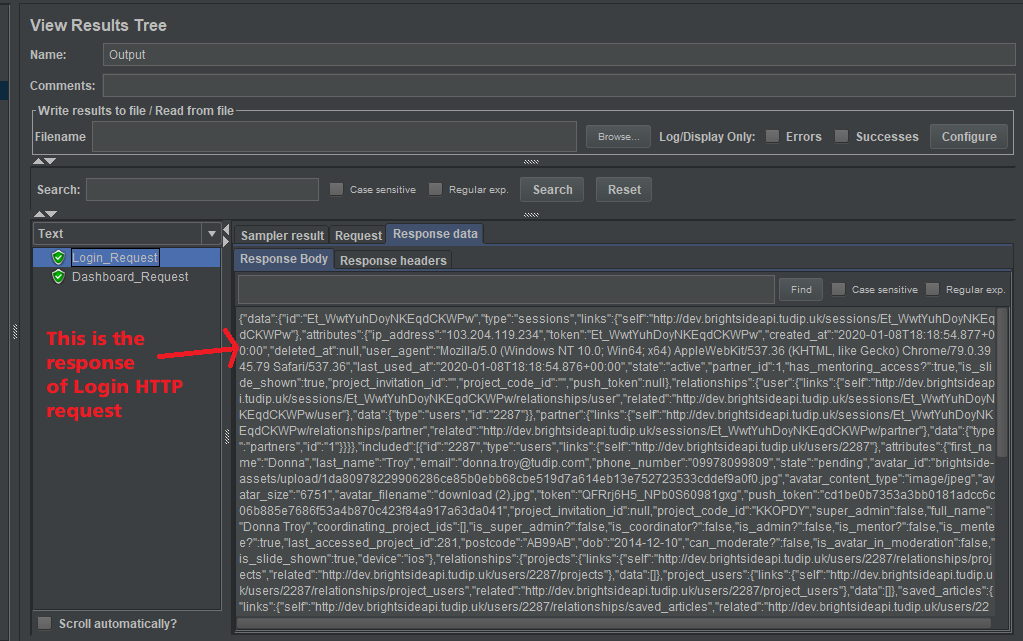
- When you run step 1, you will get the sampler results, request body and response data. In sampler data of sessions or login API, you will get the user session id called token using which can be used in the subsequent requests.
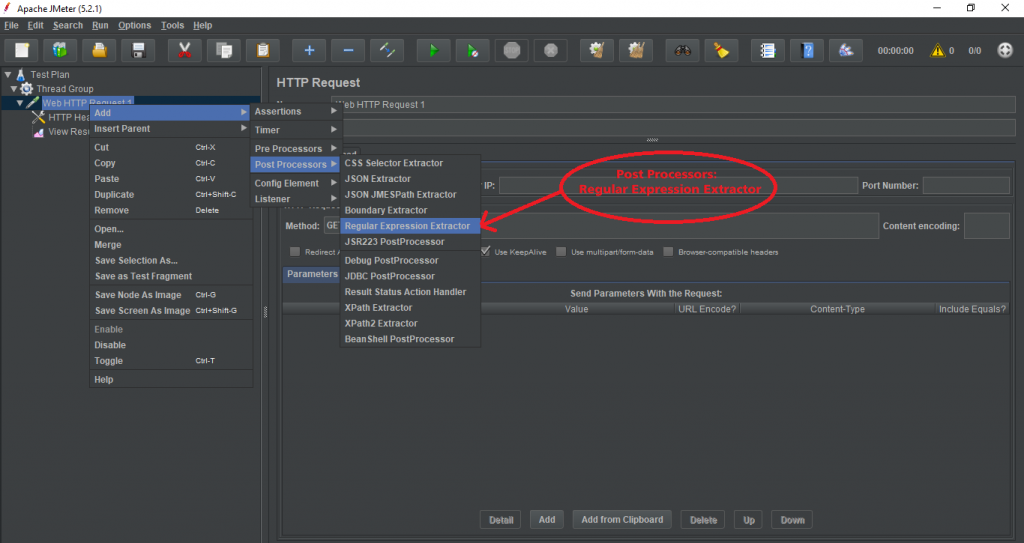
- To extract the token from the sessions or login response body, you need to add the post-processor i.e. Regular Expression Extractor.
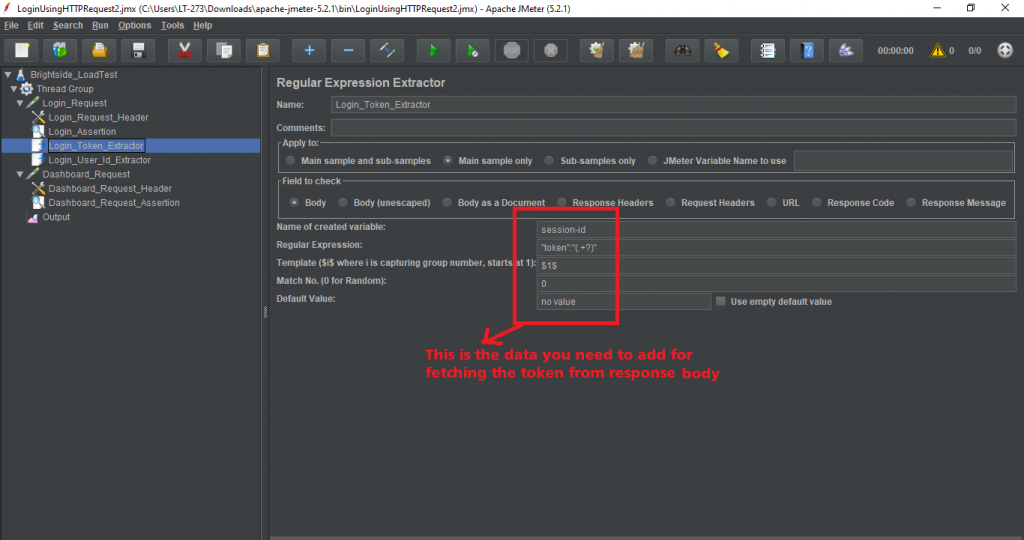
- In the Regular Expression Extractor, you can apply to the main samples or sub-samples and fields to check i.e. in body, response headers, response code, etc.
- Now, you need to create a JMeter variable in which to store the result that is to be used in the subsequent requests in the Name of the created variable field.
- Then, the main important thing is to create the regex to extract the token from login sampler data and add in the Regular Expression field. The regular expression is used to parse the response data. This must contain at least one set of parentheses “()” to capture a part of the string.
- Add the match number that indicates what match to use. The regex may match multiple times so using value 0 to indicate JMeter should choose a random match and any number greater than 0 means to select that position in the match.
- Add the default value to no value so if the regex does not match then it will set to the default value as no value.
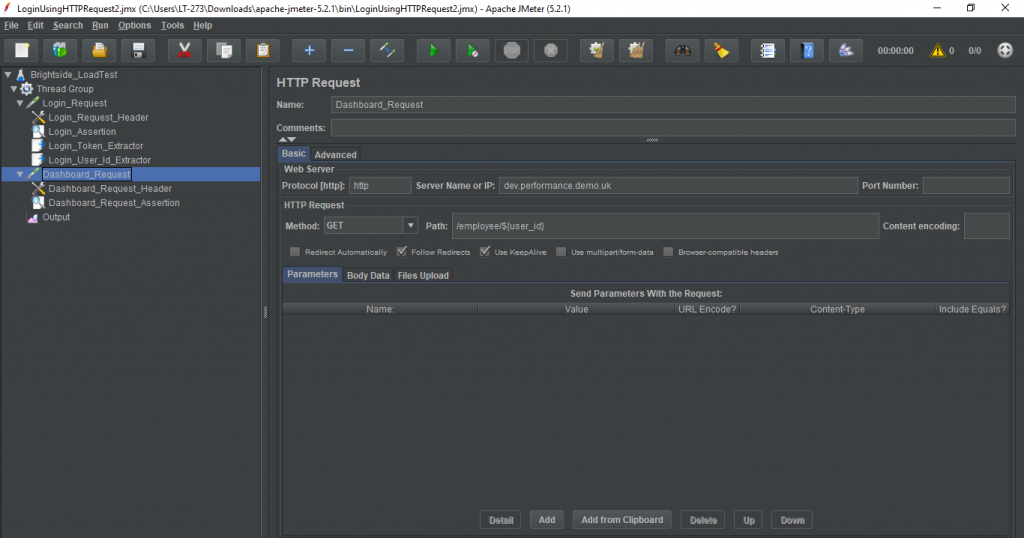
- Now add one more subsequent request Step 2 in the same thread group.
- Add the server name or IP, protocol and request type in Step 2.
- Add the required request headers in the HTTP Header Manager inside the step 2 request.
- Pass the reference variable as the Authentication Code in the header manager of Step 2 requests.
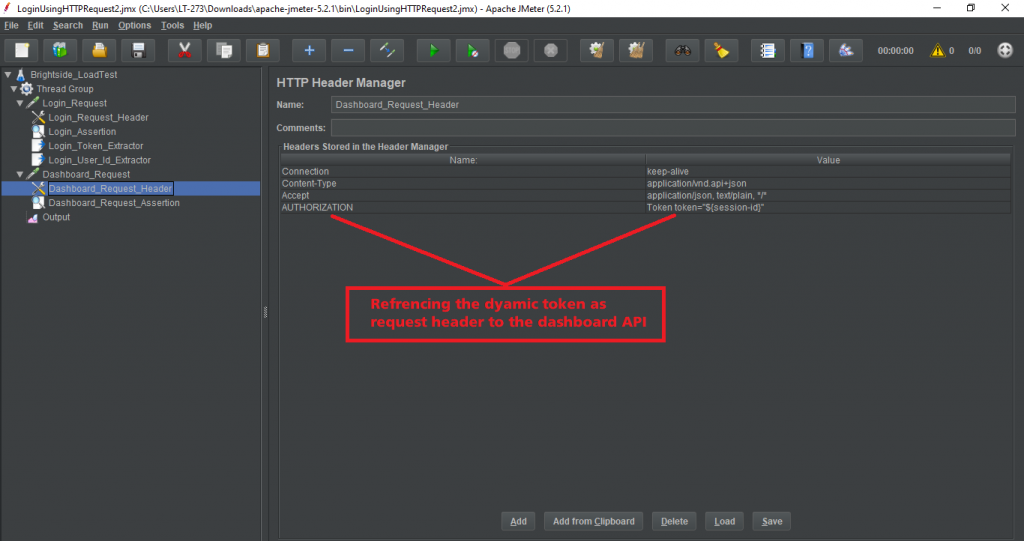
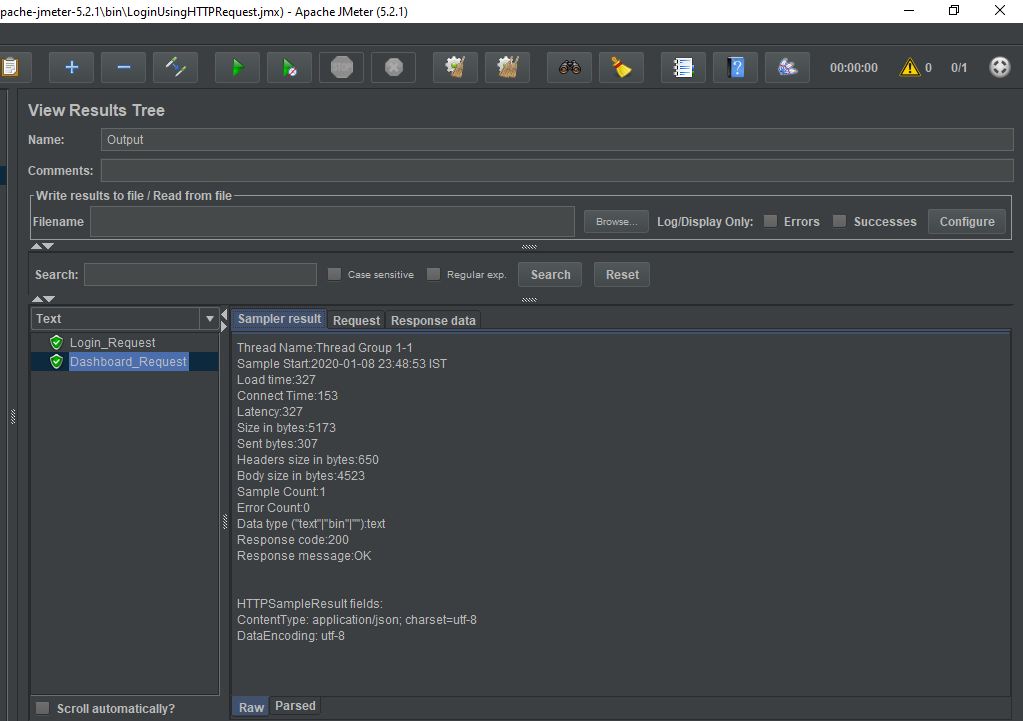
- Now add the listener View Results Tree in the Thread Group and re-run both Step 1 and Step 2 requests i.e. Login and Dashboard Http Request and check the request results in the listener as given below.
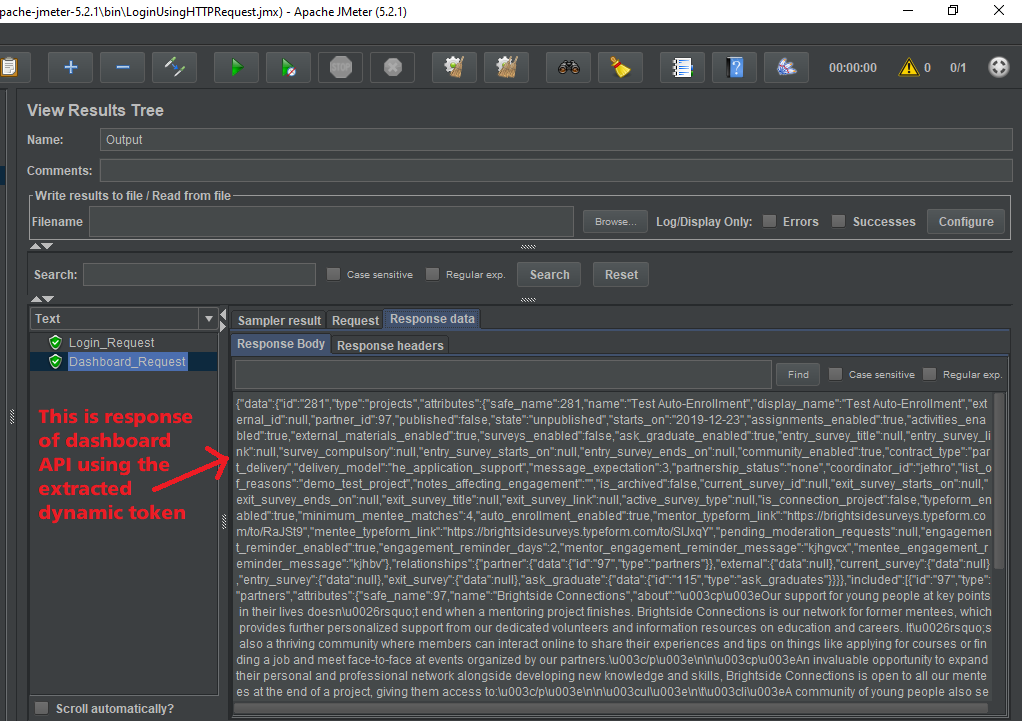
- In the above picture, you will see the request data in the dashboard step 2 request using the reference of Login step 1 request.
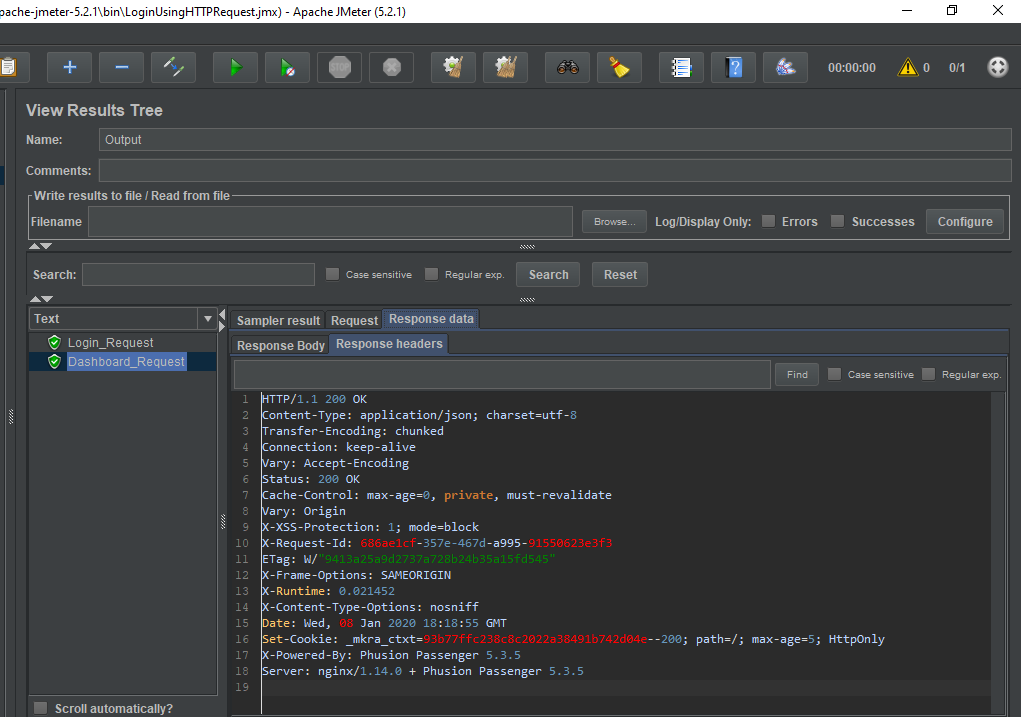
- Lastly, you can see the step 2 sampler result and response headers in the below picture.
