29 April 2021
Overview
Apache JMeter is an open-source software designed to load test functional behavior and measure performance. It can be used to test performance both on static and dynamic resources, Web dynamic applications.
- JMeter includes features like:
- Ability to load and performance test different applications/server/protocol types
- The full multithreading framework allows concurrent sampling by many threads and simultaneous sampling of different functions by separate thread groups.
- Several load statistics may be chosen with pluggable timers.
- Easy to use CSV files for different Login Credentials.
- Full-featured Test IDE that allows fast Test Plan recording (from Browsers or native applications), building, and debugging.
- Cons of JMeter:
- It supports only Java coding for custom coding.
- It can be used only on web applications.
- Consumption of memory is high in GUI Mode.
Creating Test Plan for Google Authentication
To automate the login process and test the performance of the website we need to create the test plan for that. For that we have to follow the following steps
- Create the test plan: Test plan is a series of steps jMeter is using to complete the tests. You can create a new test plan by clicking on NEW in JMeter.
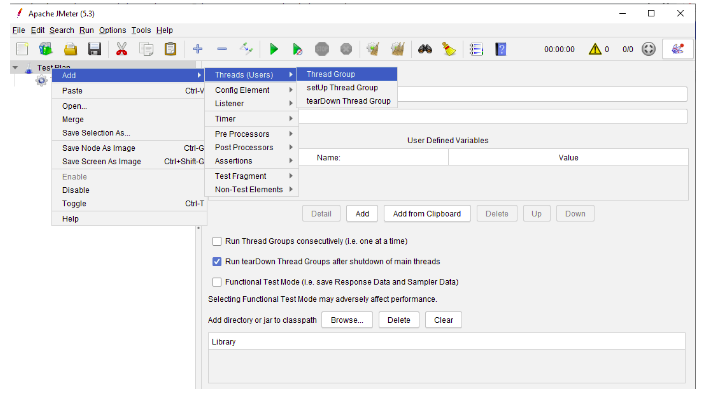
- Adding Thread: On right clicking on the test plan you can add the Thread Group.Thread Group is a set of threads used to execute the same scenarios.
- Select the Sampler: Sampler lets us send the request to the web server. In this case we are using HTTP Request as the web sampler
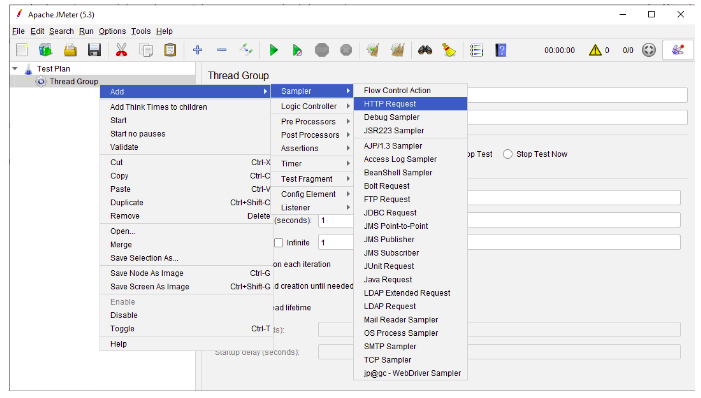 We specify the Protocol, Server name or IP, HTTP Request type, Port Number etc required here in HTTP Request.
 - Config Element: These Elements allow you to create Defaults and variables to use by samplers. We use following 3 config Elements for the Login information
- User Defined Variables: This element is used to Define the variables in the test plan with its values. Like in this case we defined the Username, Password, and URL for the website
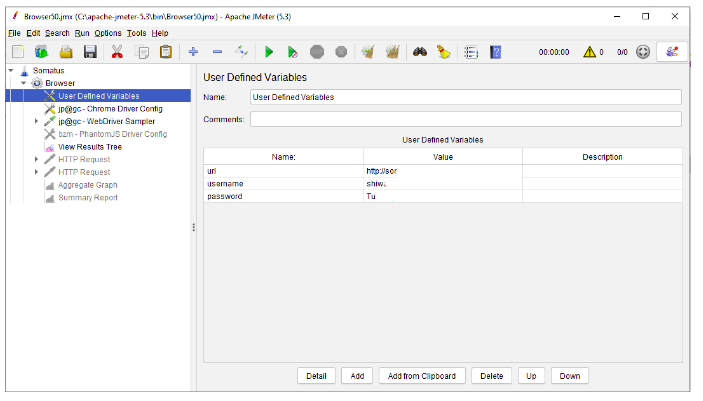
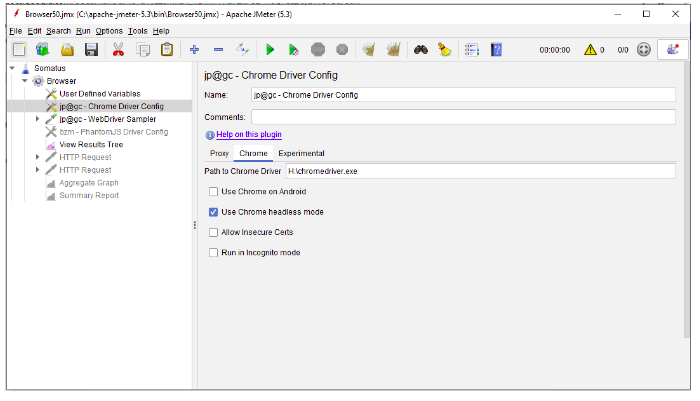
- Chrome Driver Config: This config is used to run Chrome in headless mode. Running the chrome in visible mode will use a lot of memory and processing power.
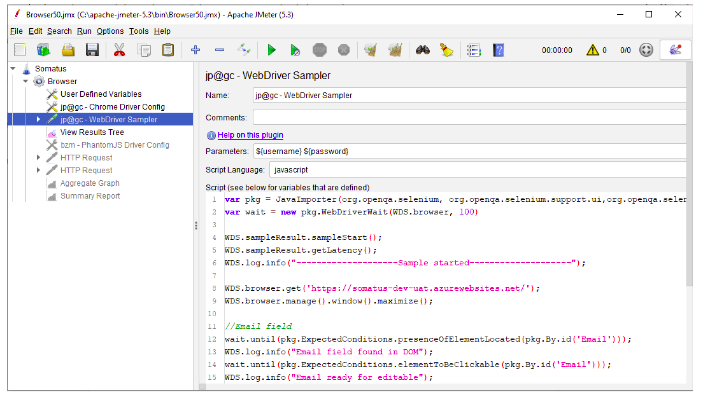
- Web Driver Sampler: This provides us the empty editor field to create the automation script for the run. Here we can Create the script with the language defined in the Scripting Language section. Here we created the script for Going on the URL, Adding the login ID and Password, Clicking on the login button and getting the home page.
- User Defined Variables: This element is used to Define the variables in the test plan with its values. Like in this case we defined the Username, Password, and URL for the website
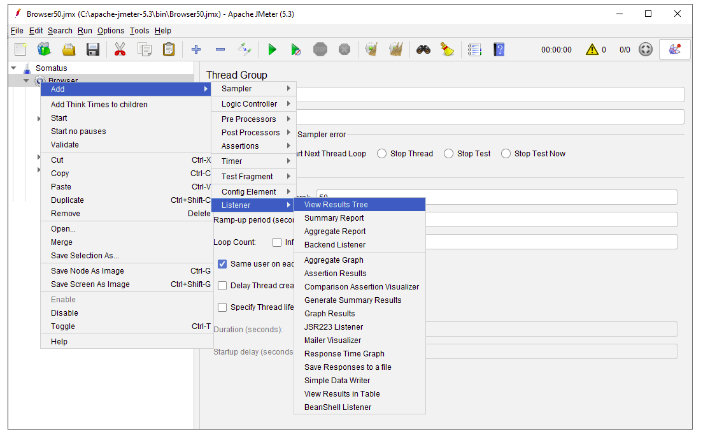
- Listener: Jmeter has many lisner according to your test plans. Here we are using View Results in Tree so we can see the actual result and what we are getting back by hitting the website.
