Jenkins is an automation tool written which is open source. This tool is written in Java with plugins built for Continuous Integration purpose. Plugins allow integration of various DevOps stages. Jenkins is the most widely accepted tool for Continuous integration because of its flexibility and the amount of plugins that used. Jenkins supports plugins, which allow Jenkins to be extended to meet the specific needs of individual projects. Plugins can be categorized like JUnit, HTML Publishers, Jenkins Build Notification Plugin, Deploy Plugin, Maven Plugin and many more. Jenkins can be installed using a native system package, Docker, or even run standalone by any machine with a Java Runtime Environment (JRE) installed.
Requirements
- Java Version 8 or 9
- Jenkins 2.168
- Jenkins Plugins.
- Selenium/WebDriver
- Web Test Script
Jenkins Installations/Setup
- Download the Jenkins 2.168 war file from https://updates.jenkins-ci.org/download/war/
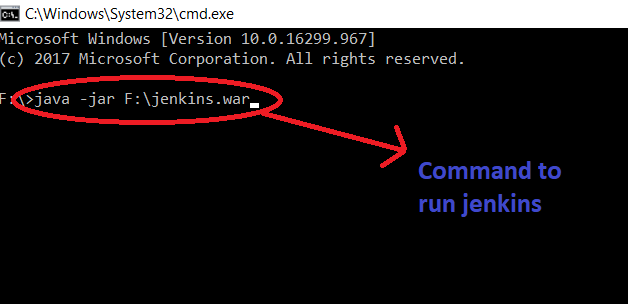
- Open the command prompt and go to the folder where Jenkins is downloaded.
- Run Jenkins.war using the following command.
java -jar #File_Path/jenkins.war
Ex. java -jar F:\jenkins.war
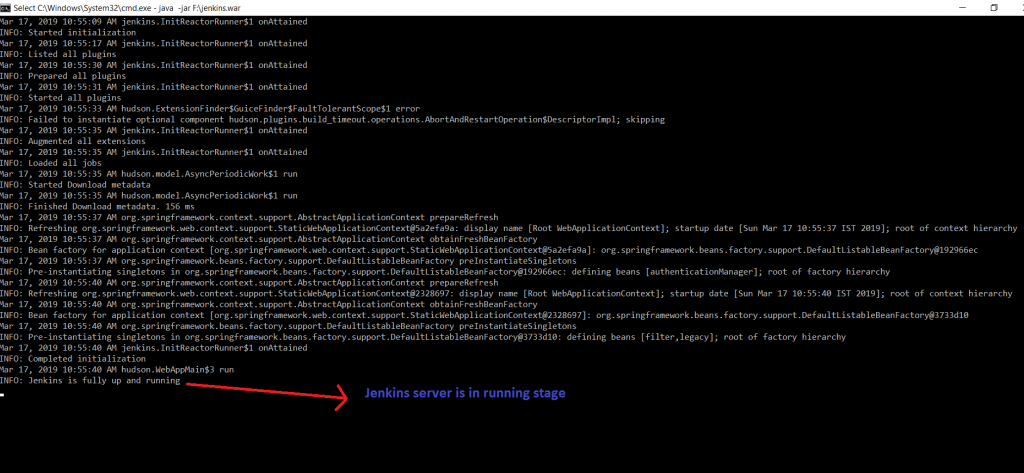
- Hit localhost:8080 in the browser. It redirects you to Jenkins login page.
- Select ‘Install Suggested Jenkins Plugins’, this will automatically add all the suggested plugins.
- Create an account in Jenkins and you will be redirected to Jenkins Dashboard page.
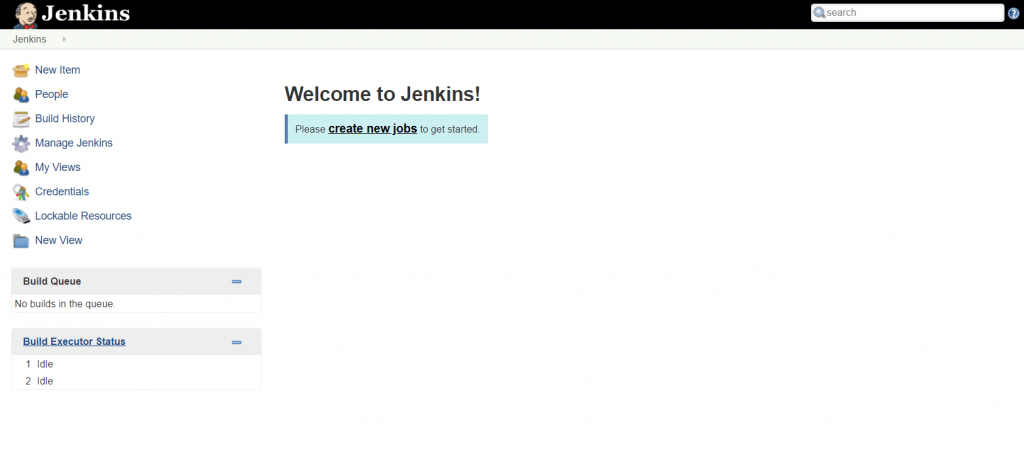
Jenkins Configuration
- Click on Manage Jenkins from the Dashboard menu.
- Go to Configure System, you have to give only the Java path so that Jenkins can identify where the java is installed.
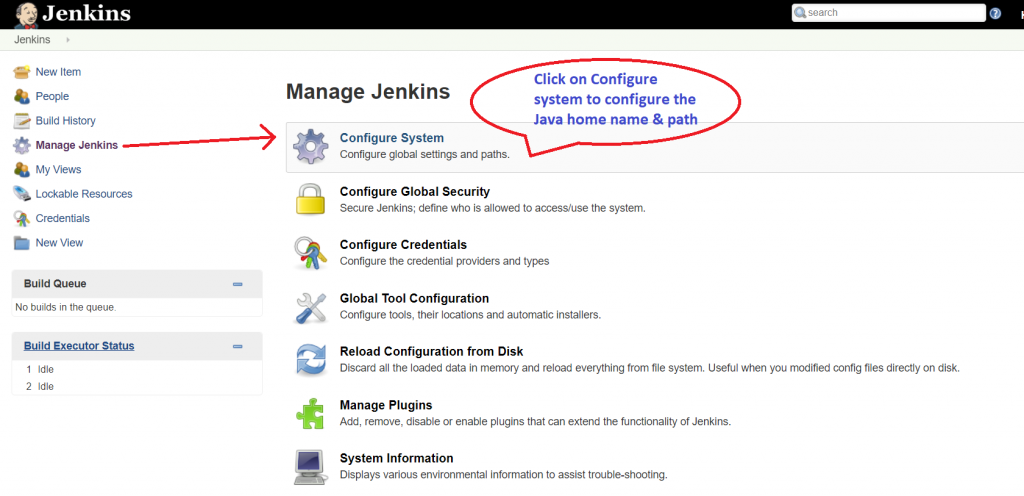
- Copy the Java Path from the system.
- Click on JDK Installation button.
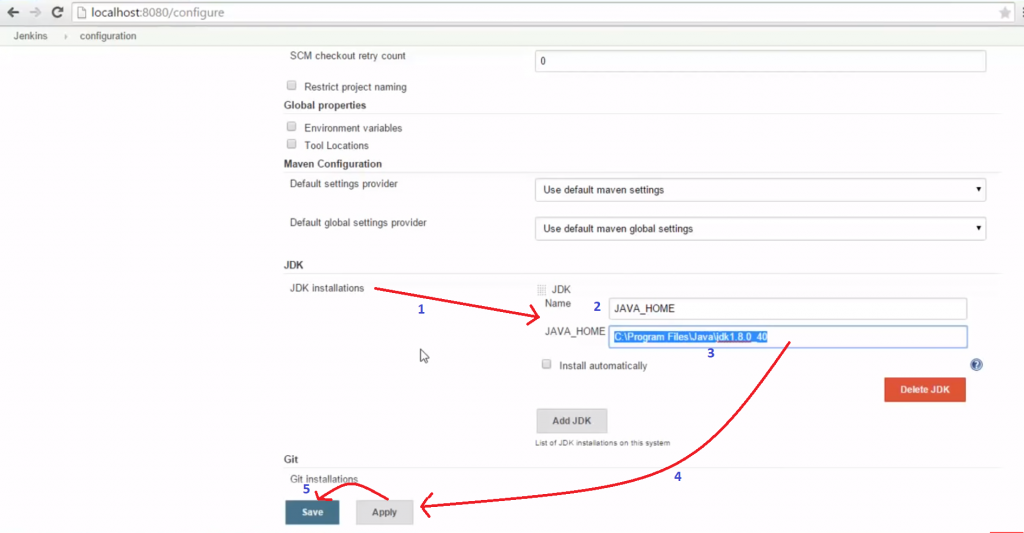
- Type the following details:
- Name: JAVA_HOME
- Java Home: Java_Path i.e. C:\Program Files\Java\jdk1.8.0_181
- Apply and Save the JDK Configuration in Jenkins.
Create a sample test script
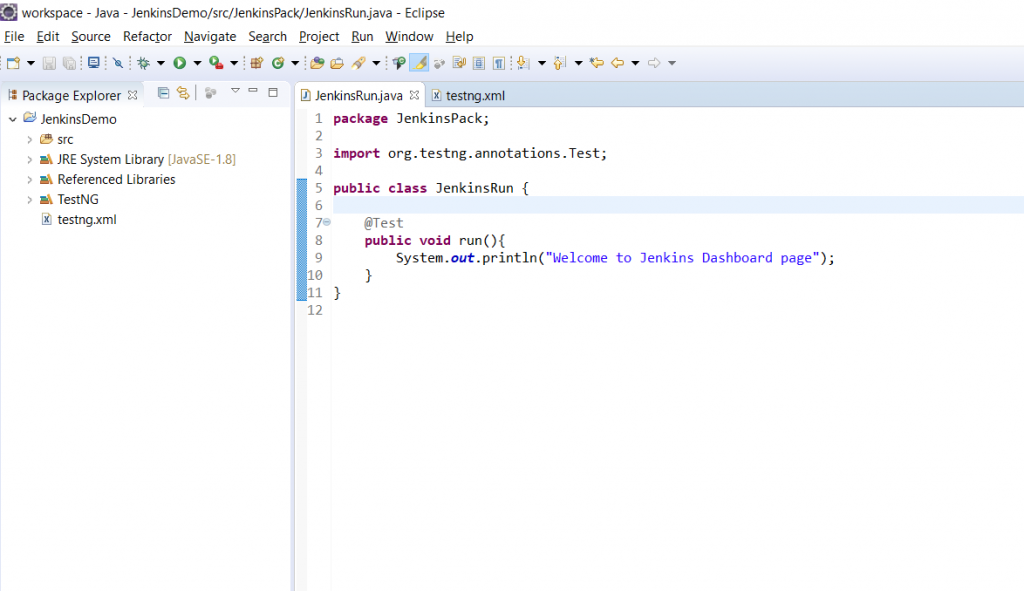
- You need to create a sample test script with TestNG annotation as shown below.
Run testng.xml file using Command Prompt
- Go to the project workspace, create a lib folder inside the project and paste all the selenium executable jar library files.
- Open the command prompt and go to the project workspace folder.
- Now, to set the classpath, we need to use the following command given below.
set classpath=#project_path\bin;#project_path\lib\*;
Ex. set classpath=C:\Workspace\JenkinsDemo\bin;C:\Workspace\JenkinsDemo\lib\*;
- Then, run the testng.xml file through the following command:
java org.testng.TestNG testng.xml
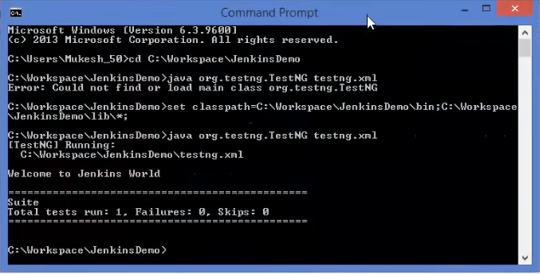
- Now, the console output or result will display in the command prompt itself as shown below:
Create a batch file and run the Jenkins job
- Create a new text document and add the following command in it:
java -cp bin;lib\* org.testng.TestNG testng.xml
- Save it with “run.bat” file name then, it will create a batch file in the project workspace folder.
- Now, go to the Jenkins dashboard page and create a new freestyle project.
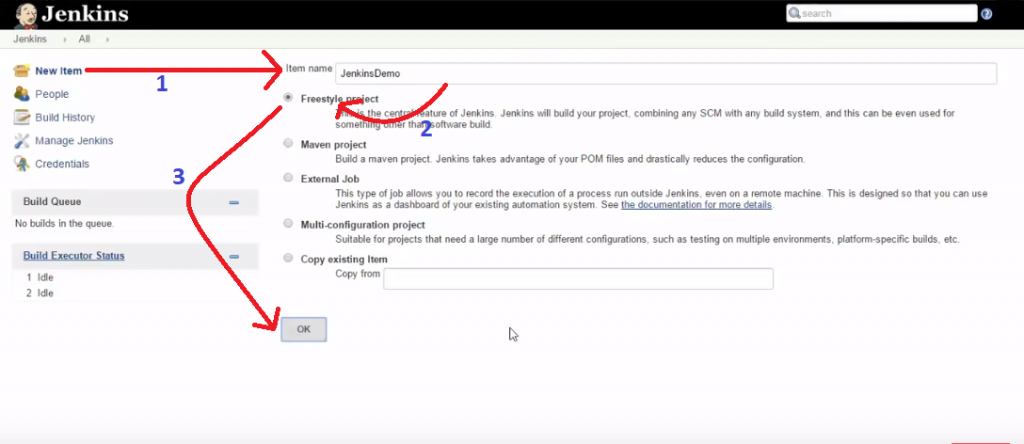
- After clicking the Ok button, you will redirect to the project configuration page.
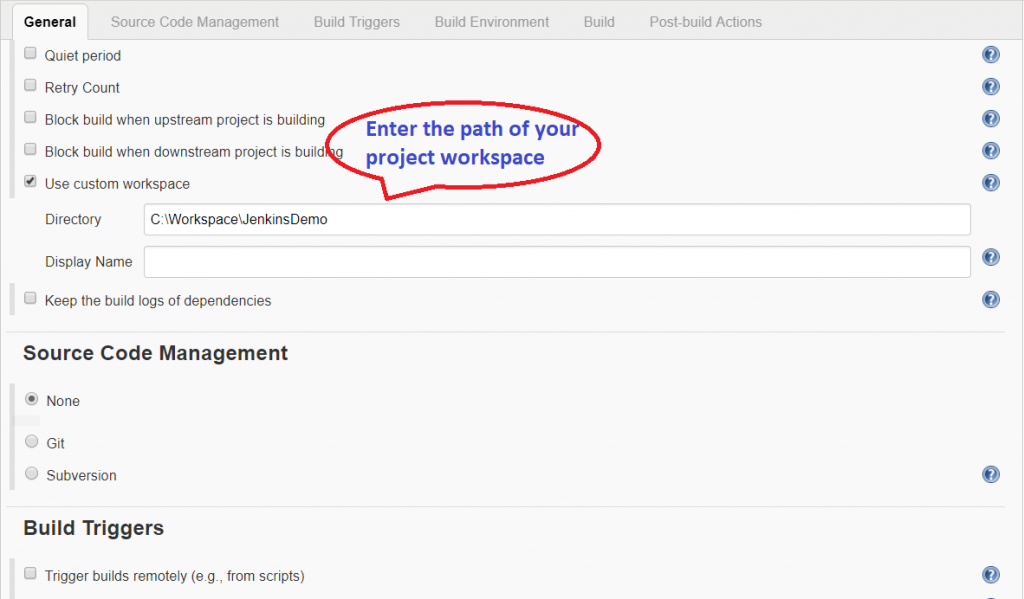
- Click the Advanced button in the Advanced Project Options.
- Select the Use Custom Workspace option and add the workspace directory in the Directory field.
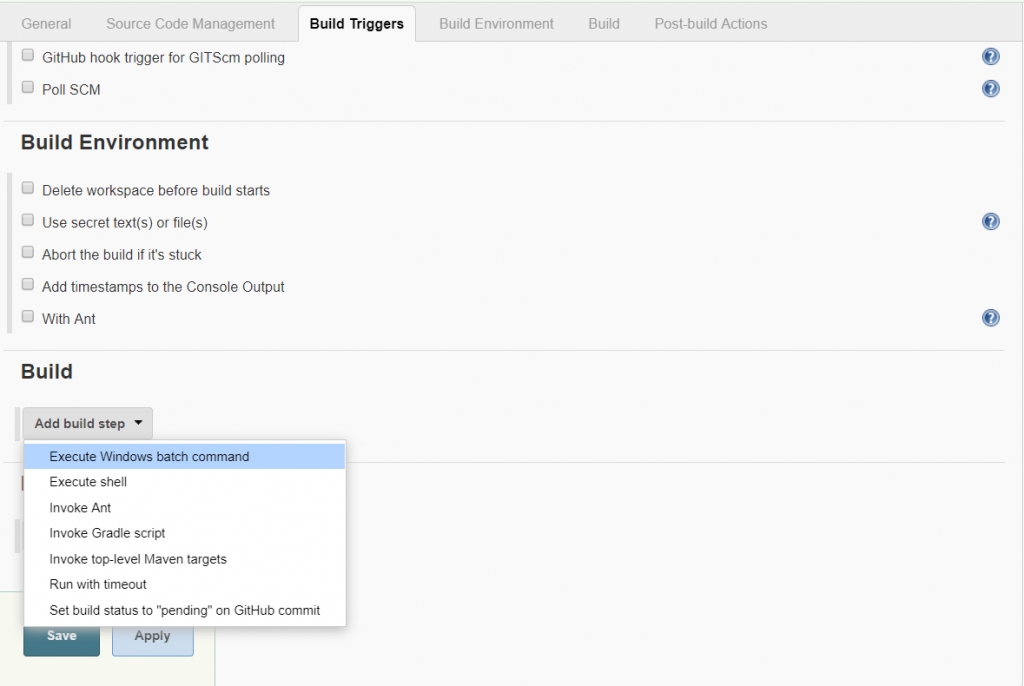
- Scroll down to Build and select the Execute windows batch command in the Add Build Step drop-down.
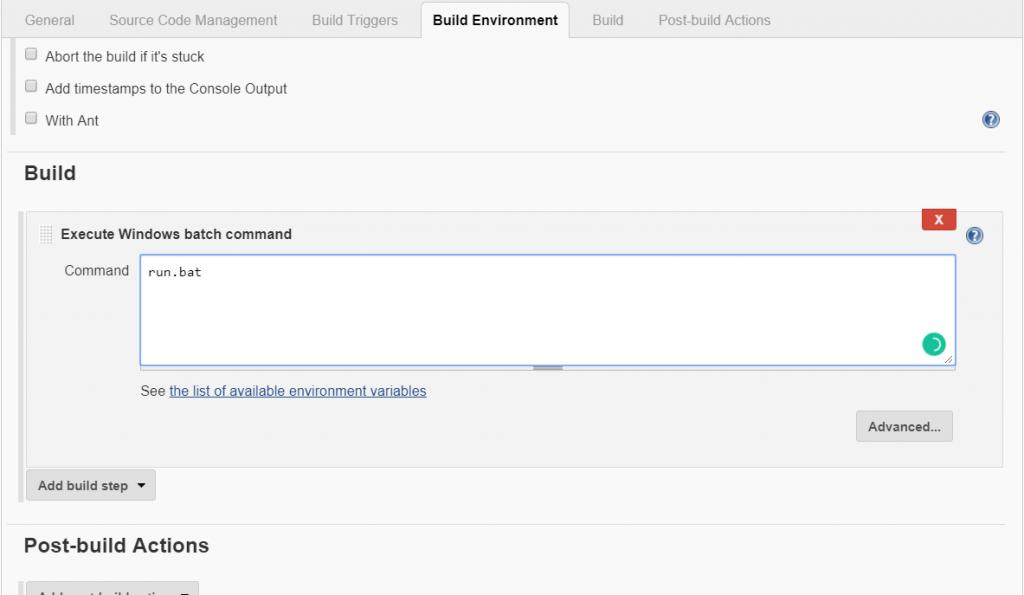
- Add the batch command as run.bat in the command field.
- Click on Apply and save the configuration then, you will redirect to the Project Workspace.
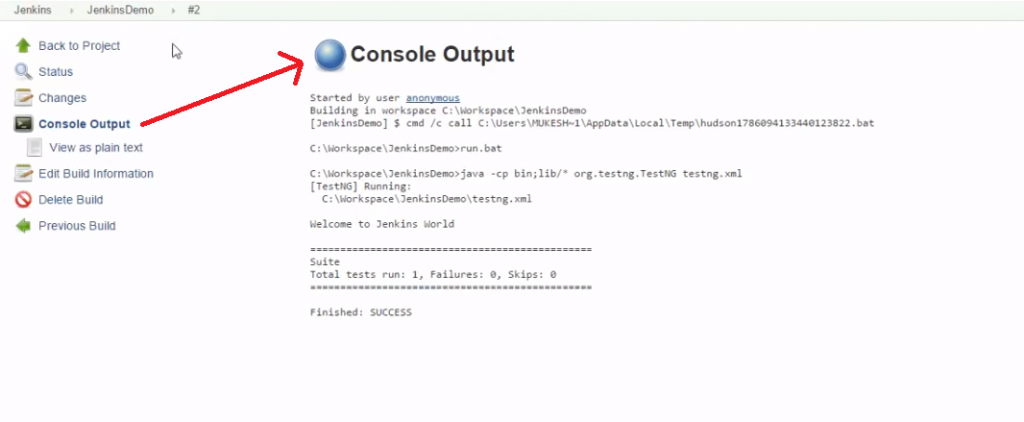
- Click on the Build Now, it will execute the given batch command that executes the run.bat file.
- You can see the console results on the Console Output.
- Whenever you will change the script then, it will build automatically and run the script through batch command.
- We can see the new changes in the build, status and also, we can run the previous build from Jenkins.
References
- Jenkins Documentation https://jenkins.io/doc/
- Installing Jenkins from https://jenkins.io/doc/book/installing/
- Jenkins Configuration from https://www.tutorialspoint.com/jenkins/jenkins_overview.htm
- https://www.guru99.com/jenkin-continuous-integration.html


