
23 November 2021
Overview
This Blog demonstrates how to Create the Dropdown list in Excel using NPOI in C#. Dropdown in Excel is the part of Data Validation in Excel. In the Excel sheet it is simple to select the validation region and apply the validation over the data. But in programming with C# it is not easy to Add Dropdown in Excel. We
Table of Contents
- What is Data Validation in Excel?
- What is NPOI and How to Add in project?
- How to Create dropdown and add data source to dropdown?
What is Data Validation in Excel?
Excel Data Validation is a feature that allows users to control the type of data entered into your worksheet. It Means it will restrict users to enter the specific data to Excel sheet cell. Data validation allows users to only enter numeric or text values to the cell, Allow numbers, Dates and times within the specified range and other. On wrong data entered to validation it gives warning to the users to correct the data.
What is NPOI and How to Add in project?
NPIO is Free, Open Source and stand-alone implementation of POI Project of Apache for C#. NPOI is to generate the Excel report without the Microsoft office suite installed on the server. It is also used to extract the text from office documents. We can read or write Excel files using NPOI.
NuGet Package is available free on NPOI can be downloaded from the NuGet store from Here and get included in the project.
How to Create dropdown and add data source to dropdown?
In Excel we can create a dropdown in data validation and assign the data source to the dropdown of two types as follows.
- Manually Entered item in dropdown.
- Data Range from the sheet.
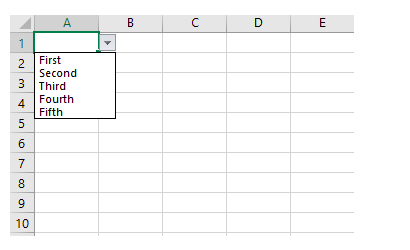
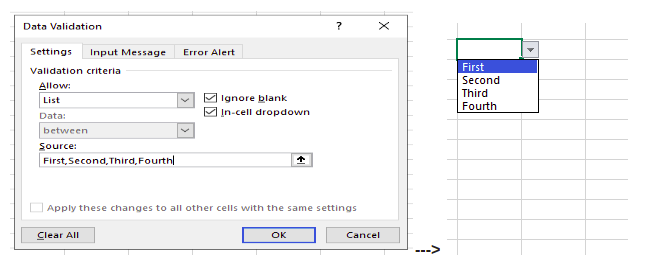
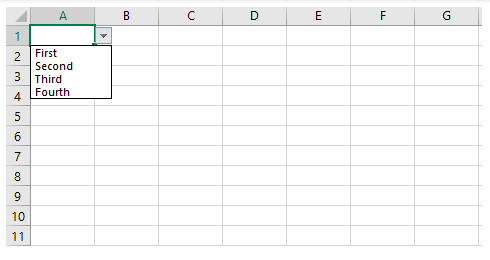
Manually Entered item in dropdown.
We can create the dropdown in excel as follows in Data Validation for manually entered Items.
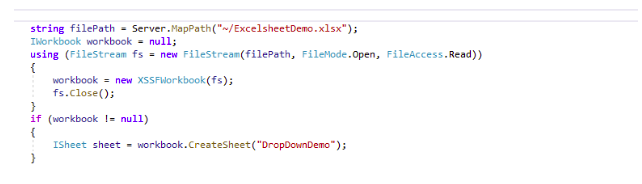
We are using NPOI for this to create documents for Excel. To create the above dropdown in C# follows the following steps.
- Create the sheet in the Excel existing workbook from the Excel file.
- Now to add Validation we need to create an object of the DataValidationHelper class as follows.
 Now we need to add a range of cells on which the data validation is applied. To achieve this we need to create the Object of CellRangeAddressList class. In the CellRangeAddressList constructor we need to pass an index of the start row, end row, start column and end column. Index of the cell in Excel starts with 0 for row and column.

- In this step we can add an external item list in the data validation. To achieve this we need to create the object of DataValidationConstant class with the Item which we want to add in our dropdown. (External item list in Excel data validation supports 256 characters of length.)

- Here we have to combine the DataValidationConstant and CellRangeAddressList to DataValidation. For this we have to create the object of the DataValidation class as follows.

- Now we have to show the validation error message on the Excel sheet when another value is entered on the cell and show the down arrow to the cell for dropdown. To achieve this we need to set the ShowErrorBox property to true and add the error message as follows.

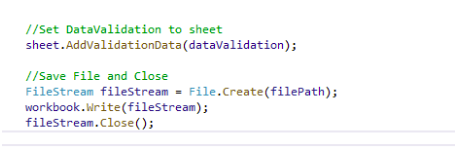
- In the final step we need to set the validation for the sheet and save the file.
- Result
Data Range from the sheet
To create the data range from the sheet we need data that is present in the same sheet or adjacent sheet in the same Excel file. For range data validation we need to create the data source equation in the data validation.
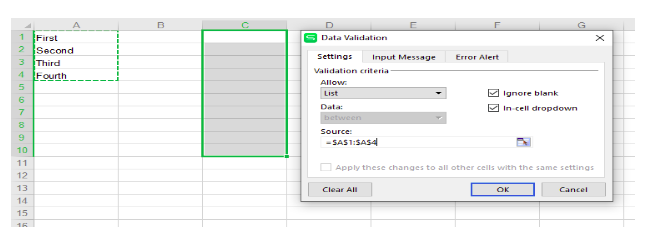
- For same sheet for the data range
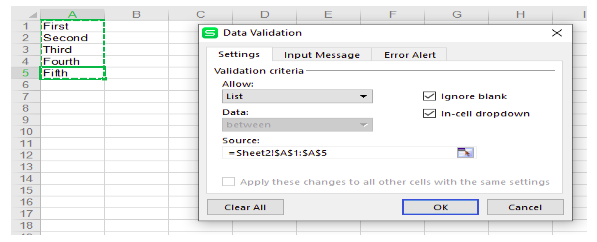
- For adjacent sheet as data range
To implement this we have to follow the step as we have done for the in Manually enter items
The Steps are the same as we used in the Manually entered items. Only we have to modify step 4 with the Different method as below.
- To add a Data Range item in the sheet we have to create the DataValidationConstant class with the formula for the source used in the data validation.
For the same sheet we have to use the formula as=$<start column>$<start row>:$<end column>$<end row>
Example : =$A$1:$A$4
 For the adjacent sheet data range we have to use the formula
=<sheet name>!$<start column>$<start row>:$<end column>$<end row>
Example : =Sheet2!$A$1:$A$5
 To create a Data range formula, We can use data validation from the sheet. Data range formula only supports the same column for start and end columns in the formula.
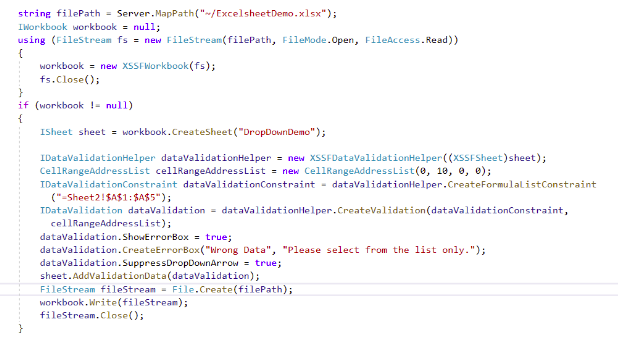
 - Over all code.
- Result.