17 August 2021
Using firebase cloud messaging
Overview
We all get notifications on our mobile devices ever wondered how does your device receive & Handle notification whether be in foreground, background.
Firebase cloud messaging is a tool supported by google used to send notifications to a single device or group of devices.
Firebase Cloud Messaging
FCM is a cross-platform messaging solution that allows sending messages/notifications to users at no cost
Using FCM, you can notify users about offers & other activities. You can send notifications Messages to increase user engagement with your application . for the use case you can send a payload with notifications up to 4 kb to a client app.
Now, let’s implement FCM to our android project
Firebase project Creation
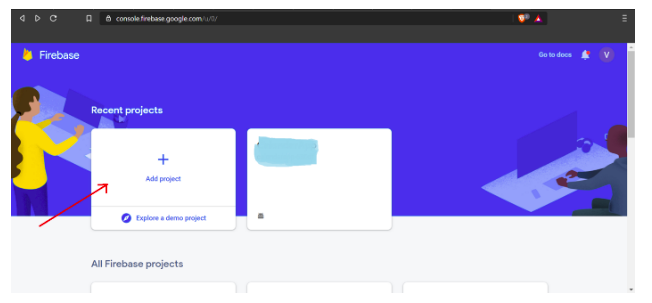
- First, go to the Firebase Console

- Click on add project and follow all steps
- After adding the project add the android application in the same project.
- Enter the project name, package name, and SHA-1 key for your android project.
- Follow all the steps for linking firebase with the android application.
You can add firebase through your android studio as well using this
Till now, we linked our android studio project to the firebase. now we will add firebase SDK in our project to handle the notification.
Adding Firebase SDK
- add google service dependency in <project>/build. Gradle file.
buildscript { dependencies { // Add this line classpath 'com.google.gms:google-services:4.3.2' } } - Now, add firebase messaging dependency in <project>/build.gradle
dependencies { // Add this line implementation 'com.google.firebase:firebase-messaging:20.0.0' } ... // Add to the bottom of the file apply plugin: 'com.google.gms.google-services' - Now, sync the project and rebuild the Gradle class.
Notification Targeting Type
Single Device:
To send notifications to specific users we need the FCM token of that user device.
This token we can retrieve in-app and sent to the backend to store in the database.
How To get a registration token?
FirebaseInstanceId.getInstance().getInstanceId()

                       .addOnCompleteListener(new OnCompleteListener<InstanceIdResult>() {

       @Override

       public void onComplete(@NonNull Task<InstanceIdResult> task) {

           if (!task.isSuccessful()) {

               Log.w(TAG, "getInstanceId failed",

               task.getException());

               return;

           }

           // Get new Instance ID token

           String token = task.getResult().getToken();

       }

   });
Group Notification:
To send notifications for multiple users we use subscribe method.
By subscribing method, we add users in a specif group and by using this we can send notifications to multiple users.
We can unsubscribe users to remove users from the group.
Subscribe Topic:
FirebaseMessaging.getInstance().subscribeToTopic("TopicName");
Unsubscribe Topic:
FirebaseMessaging.getInstance().unsubscribeFromTopic("TopicName");
Notification Message Type
Notification payload:
Notification payload provides nothing much for customization we have two fixed object values in this
“Title ” – in this we add a title of our notification
“Body” – in this we add a description of our notification
{

"message":{

   "token":"bk3RNwTe3H0:CI2k_HHwgIpoDKCIZvvDMExUdFQ3P1...",

   "notification":{

     "title":"Portugal vs. Denmark",

     "body":"great match!"

   }

 }

}
Data payload:
Data payload provides more customization you can add more objected or values.
It contains custom key-value pairs. you can handle this object on your android side and use according to your requirement.
{

 "message":{

   "token":"bk3RNwTe3H0:CI2k_HHwgIpoDKCIZvvDMExUdFQ3P1...",

   "data":{

     "Nick" : "Mario",

     "body" : "great match!",

     "Room" : "PortugalVSDenmark"}}}
Handling Push notification
Handling push notification is the most crucial part of this whole blog
Basically handling of push notifications in android devices is depending upon the payload type and state of the device (foreground, background, killed )

Handling Notification & Data payload:
If the application is in the background notification is automatically handled by the system and appears in the notification tray without waking up the app.
But for the foreground state, we have to handle notification using onMessageRecvied Function.
Declare the activity as a service in-app manifest
Add service in-app manifest class.
 <service

   android:name=".MyFirebaseMessagingService"

   android:exported="false">

   <intent-filter>

       <action android:name="com.google.firebase.MESSAGING_EVENT"/>

   </intent-filter>

</service>
Create MyFirebaseMessagingService class for the handle onMesaageRecived function.
Add following code in-service class.
@Override

public void onMessageReceived(@NonNull RemoteMessage remoteMessage) {

   super.onMessageReceived(remoteMessage);

   sendNotification(remoteMessage);

}

private void sendNotification(RemoteMessage remoteMessage) {

       Intent intent = new Intent(this, MainActivity.class);

       PendingIntent pendingIntent =PendingIntent.getActivity(this,

                             m,intent,PendingIntent.FLAG_ONE_SHOT);

       String channelId =    getString(R.string.default_notification_channel_id);

       Uri defaultSoundUri = RingtoneManager.getDefaultUri(RingtoneManager.TYPE_NOTIFICATION);

NotificationCompat.Builder notificationBuilder;

       notificationBuilder =

       new NotificationCompat.Builder(this, channelId)

       .setSmallIcon(R.drawable.geekhaven_transparent)

       .setContentTitle(remoteMessage.getNotification.getTitle)

       .setContentText(remoteMessage.getNotification.getBody)

       .setAutoCancel(true)

       .setSound(defaultSoundUri)

       .setContentIntent(pendingIntent);

NotificationManager notificationManager =

       (NotificationManager) getSystemService(Context.NOTIFICATION_SERVICE);


// Since android Oreo notification channel is needed.

if (Build.VERSION.SDK_INT >= Build.VERSION_CODES.O) {

   NotificationChannel channel = new NotificationChannel(channelId,

           "Channel human readable title",

           NotificationManager.IMPORTANCE_DEFAULT);

   notificationManager.createNotificationChannel(channel);

}

notificationManager.notify(m, notificationBuilder.build());
- In the onMassageRecieved handle, remote messages send by the backend.
- Create a notification using notification builder.
- Set Title, body, sound, icon in notification builder.
If you are using only data payload then for title and body you will use like this
.setContentTitle(remoteMessage.getData.get(“yourkey”))

.setContentText(remoteMessage.getData.get(“yourkey”))
If you are pushing notifications through the backend then you have to update token from devices whenever they change using the onNewToken method
override fun onNewToken(token: String) {

    //sendRegistrationToServer(token)

}
How to send Push notifications manually
To send notifications manually you can use the Firebase console
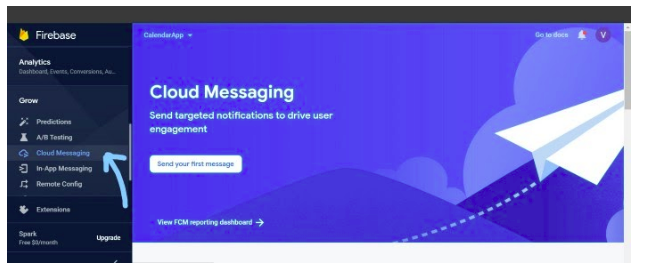
Go to Firebase Console→Grow →Cloud Messaging

Click on send your first message

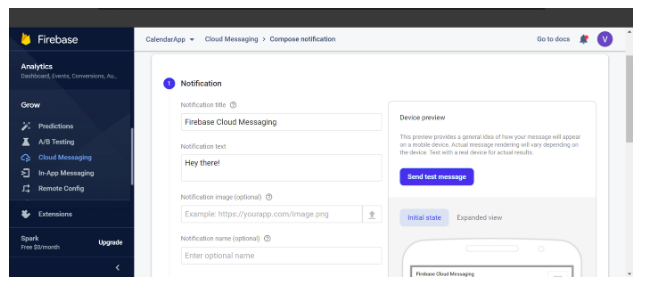
Then Enter the title & body filed.
Now, Click on Test
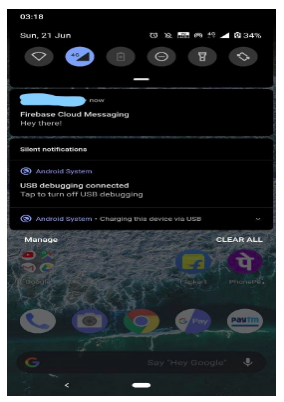
Whoa ! you will receive your FCM notification

How to send Push notifications to form postman
- Select Post Enter Request Url
https://fcm.googleapis.com/fcm/send
- Add Headers and content type
Authorization: key=<server_key>

Content-Type: application/json.
Server key – you can get your server key from the firebase project.
Go to Firebase console — →Project Settings — →Cloud Messaging.
To send a message select Body – RAW – JSON
{

 "to" : "YOUR_FCM_TOKEN",

 "notification" : {

     "body" : "Body of Your Notification",

     "title": "Title of Your Notification"

 },

 "data" : {

     "body" : "Notification Body",

     "title": "Notification Title",

     "key_1" : "Value for key_1",

     "key_2" : "Value for key_2"

 }

}
For sending on subscribe topic use: “to”:”topic/topic_name”


