03 June 2021
Introduction
Google tag manager (GTM) is a free tag management platform that enables marketers to deploy and track the marketing data by easily adding code snippets to their website or app. Google tag manager allows you to install various types of tags to your website. Good examples of tags are Google Analytics tracking code, Adwords conversion script and remarketing tags, Google Analytics event codes. There are many more types of code that we can add to your website using GTM, including custom codes(tags).
Features of Google tag manager
- Container: When you start working at GTM, first you have to create a container and it gives you snippets of code that you have to add to the source code of the website. This is the container code that gives access to all the pages after adding to the source file.
- Trigger: It controls when and how your tags fire to get all of the data that you need.
- Variables and constants: While tags depend on triggers, triggers depend on variables. Variables contain the value that needs triggers to evaluate to know whether or not it should fire. The tag compares the worth of the variable to the worth defined within the trigger and if the variable meets the conditions of the trigger, then the tag will fire.
- Datalayer: Data layer is a JavaScript object which keeps the information tags separate from the rest of your site’s code.
Prior to the GTM, Google Analytics tracking codes had to be hard-coded, usually by web developers on each individual page of the web site. Having hundreds of click events is very difficult when it comes to maintaining them. But Google Tag Manager solves this problem because all your tags are stored in one place in your Google tag manager account.

Working with GTM
Setup account and container:
To get started with the Google tag manager, first go to tagmanager.google.com and create an account. Under “Account Setup”, enter the name of the company and country whose site is being managed.
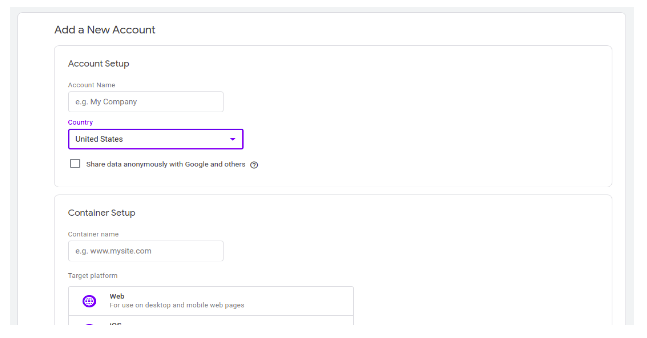
Next, we have to set the container.
Enter your domain name as the container name and choose which type of page or app like web, android, IOSetc, it will be used on, And click the “create” button.
Note: I specifically said to use the company name as the account name and the site’s domain for the container name. In theory, you can name this anything you want.
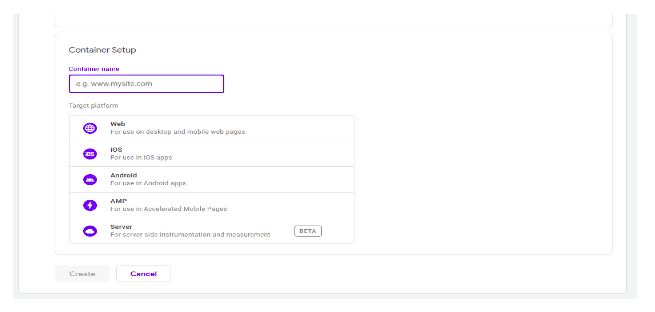
After clicking the create button to create the account then accept the GTM terms of service and you’ll be given your container code.
Here is the container code:
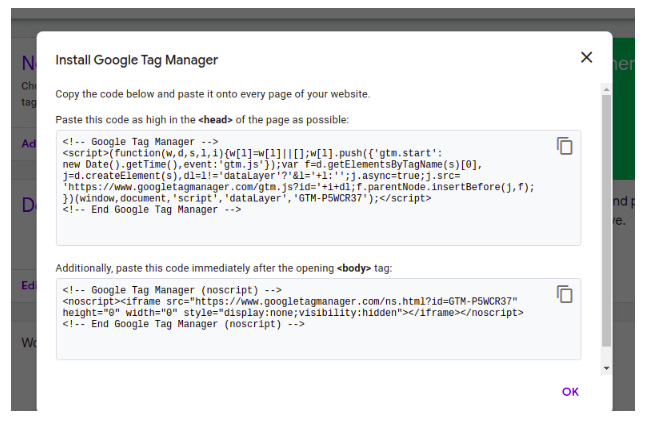
In this we have to paste the code as per instruction, Once the container code has been added, you’re able to start creating tags.
Create a tag on google tag manager:
After doing the setup of the GTM account, we have to figure out exactly which tags you want to add.
When you create or select a container, the first thing you’ll see is the GTM dashboard. We’ll eventually get around to talking about almost everything you see here.
But now we will start to create the new tag by clicking the new tag tab president on the Google Tag Manager dashboard.
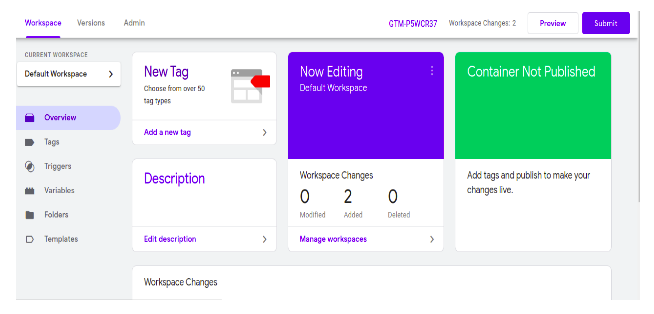
After clicking the new tag button you have to write your tag name then click on the tag configuration button.
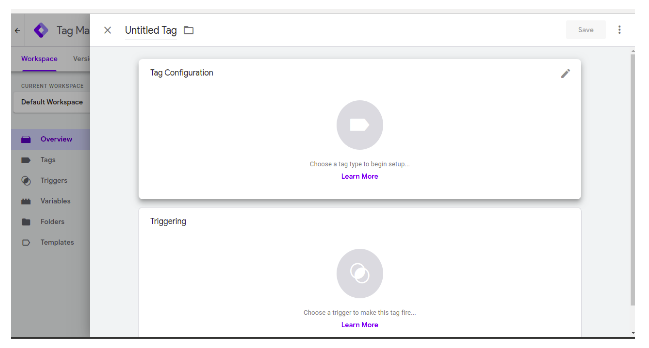
After clicking the tag configuration button we will get this window, here we have to select the tag type. Now we are using google analytics: universal analytics.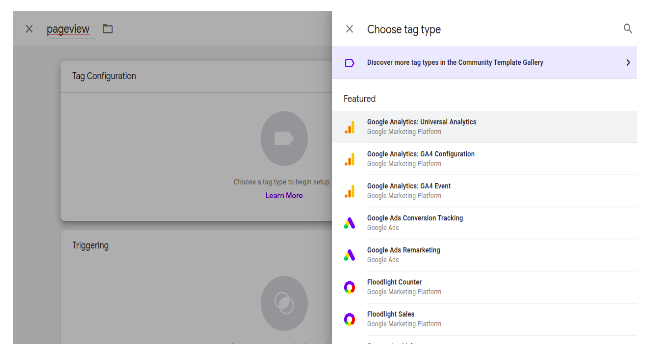
Then we have to add a trigger that will fire when this tag is fired. We have to click on the tag configure button then we get this window, here if we want to use a predefined trigger then we can use it or we can create a new tag as well.
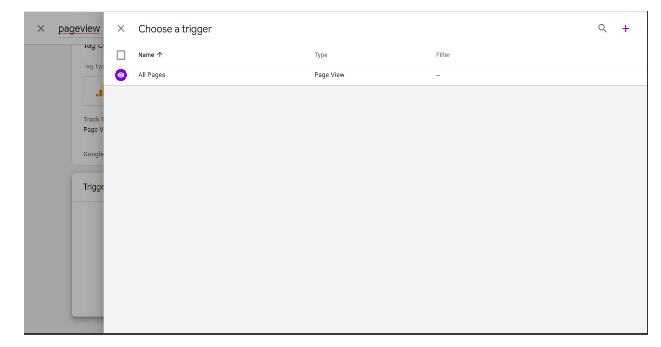
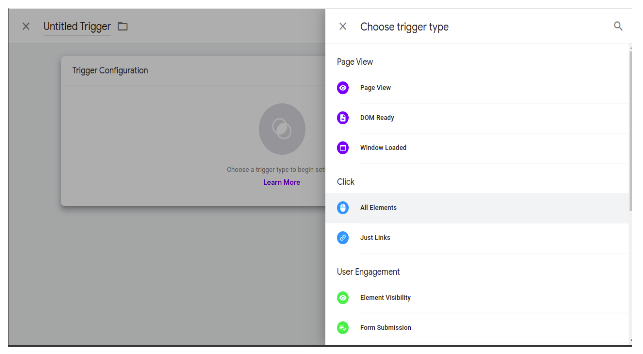
To create a new trigger we have to click on the add button then we have this window to configure the tag. We have entered the name of the trigger.
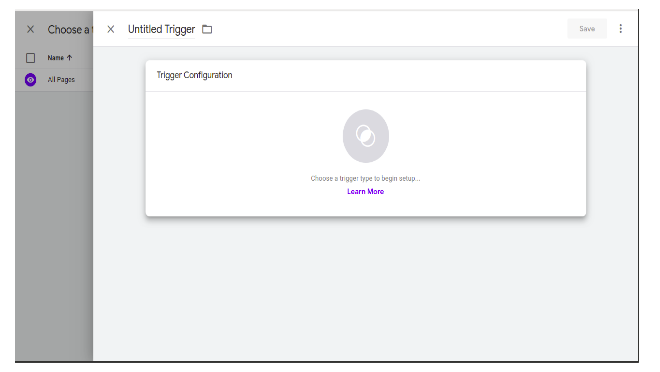
Then we have to set trigger types like pageview, DOM Ready, window loaded.
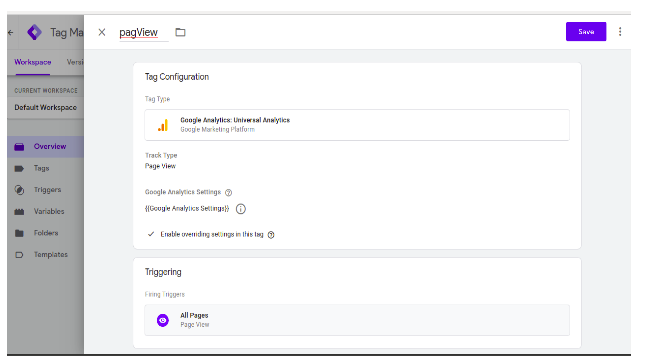
After configuring the trigger we add this trigger to the tag. After the trigger to tag and setting the tag we get this window. In this window when we click on the save button then our tag is created.
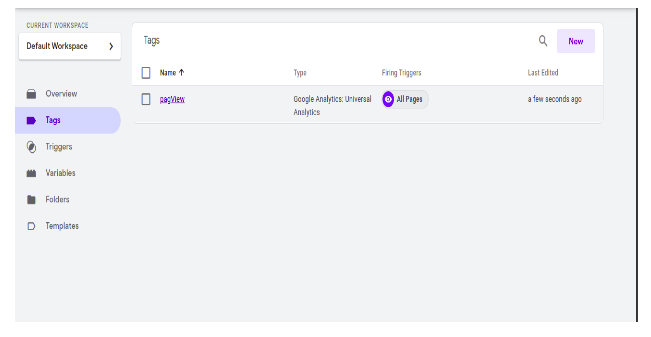
After clicking the save button our tag is created. To view the created tag we have to click on the tag arrow present on the left side of the GTM dashboard. After clicking tags we get all the tags that we created.
Preview, debugging and publishing the created tags:
GTM’s “Preview & Debug” mode lets you test tags before publication so that you can make sure everything is working correctly and that you won’t have any errors throwing off your data.
To enter the “Preview & Debug” mode, click the “Preview” button in the upper right corner of the GTM dashboard and you’ll see the new window is open where we have to enter our site link and click to the start button.
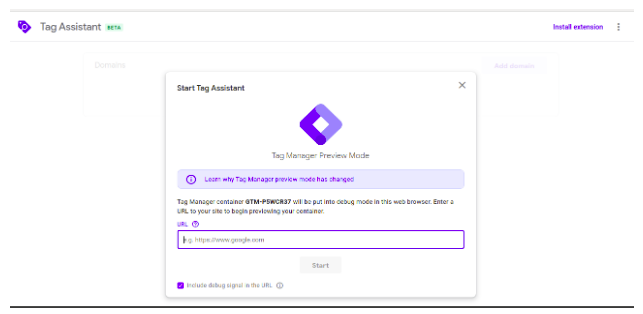
Next, open the site you’re tagging. If you have already got your site open in another tab, refresh the page and you ought to see a “Debug” panel at the rock bottom of your screen. (don’t worry, visitors to your site because they won’t be able to see it.)
Once it appears that all of our tags are firing correctly, we can go ahead and publish them. From the Google tag manager (GTM) dashboard hit the “Submit” button in the upper right corner of the page and you’ll be asked to review your changes. If everything looks ok, then enter the name and description for your new container version and publish it.
Conclusion
Basically, tags are used to track the events, views on our application, and Google tag manager manages these tags on a single platform. GTM helps us to know how users interact with our application. What they want and what they don’t want from our application. Like If we have an e-commerce application then we will easily know the number of views of each product, page, and other data. With this, we easily understand the user requirements.
That will help us to understand the user’s views, likes, dislikes of the product and page. It also helps us to manage the traffic of our application.


