21 January 2021
Introduction
To make label printers do something useful, you need to give them the data to print the labels in the right format. This is where the “printer languages” come in. Multiple label printers have created their own programming languages. Zebra Technologies have their Zebra Programming Language as a printer language. All ZPL compatible printers use this as an instruction for generating the images printed on the labels. For example, it tells the printer the label length, position, and paper width, along with all the other configurations for the label.
We’ll use the “zebra-zpl” gem for printing labels with Zebra printers through the Rails app. We can see how we can implement the APIs using this gem to generate the ZPL string according to the need for the labels and different types of elements.
Installation
Add this line to your application’s Gemfile:
gem 'zebra-zpl'
And then execute:
bundle install
Usage
Building labels:
With an instance of the Zebra::Zpl::Label class you create new labels. It embraces alternatives such as:
- width: The width of the label, in dots.
- length: The length of the label, in dots.
- print_speed: The print speed to be used. Available values are between 0 and 6. This option is required.
- print_density: The print density to be used in dpmm. Available values are between 0 and 15.
You may start adding elements with a label to it:
badge_label = Zebra::Zpl::Label.new(
  width: 400,
  length: 300,
  print_speed: 3,
  print_density: 6
)
text_element  = Zebra::Zpl::Text.new(
  data:       "Tudip Technologies",
  position:   [50, 50],
  font_size:  Zebra::Zpl::FontSize::SIZE_5
)
badge_label << te

xt_element
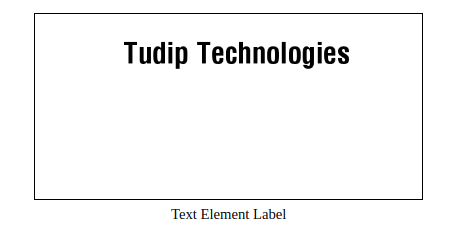
The above label will be displayed as follows:
You can add as many elements as you want in the label.
Printing the labels:
For CUPS you must have your printer available. Using a Zebra::PrintJob case, you can submit the labels to the printer once your printer is configured, and you know its name on CUPS.
badge_label = Zebra::Zpl::Label.new(
  width:        300,
  length:       300,
  print_speed:  3
)
Barcode_element = Zebra::Zpl::Barcode.new(
  data:                        'https://tudip.com/',
  position:                    [50, 50],
  height:                      100,
  print_human_readable_code:   true,
  narrow_bar_width:            4,
  wide_bar_width:              8,
  type:                   Zebra::Zpl::BarcodeType::CODE_128_AUTO
)
badge_label << Barcode_element
print_job = Zebra::PrintJob.new '<your-printer-name-on-cups>'
ip = ‘<IP/Host where the print queue lives>’ # can use ‘localhost’, ‘127.0.0.1’, or ‘0.0.0.0’ for local machine
print_job.print label, ip
This will persist the label contents to a tempfile (using Ruby’s tempfile core library) and copy the file to the printer using lp -h <hostname/ip> -d <your-printer-name-on-cups> -o raw <path-to-the-tempfile> (for Unix systems). All the tempfile creation/path resolution, as well as which command has to be used, are handled by the PrintJob class.
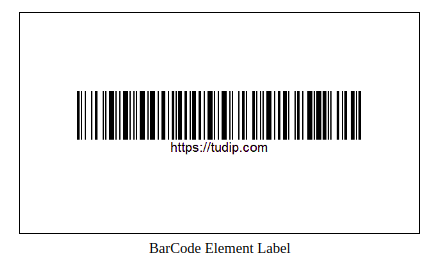
The above label for BarCode will be displayed as follows:
Available elements
Text:
You create text elements to print using instances of the Zebra::Zpl::Text class. It accepts the following options:
- position: An array with the coordinates to place the text, in dots.
- rotation: The rotation for the text. More about the possible values below (see Rotation section).
- data: The text to be printed.
- print_mode: The print mode. Can be normal (“N”) or reverse (“R”).
- font_size: The font size to use. You can use values between 1 and 5.
For the print modes, you can also use the constants:
Zebra::Zpl::PrintMode::NORMAL
Zebra::Zpl::PrintMode::REVERSE
Barcodes:
You create barcode elements to print using instances of the Zebra::Zpl::Barcode class. It accepts the following options:
- position: An array with the coordinates to place the barcode, in dots.
- height: The barcode’s height, in dots.
- rotation: The rotation for the text. More about the possible values below (see Rotation section).
- data: The text to be printed.
- type: The type os barcode to use. More on the available types below.
- narrow_bar_width: The barcode’s narrow bar width, in dots.
- wide_bar_width: The barcode’s wide bar width, in dots.
- print_human_readable_code: Can be true or false, indicates if the human readable contents should be printed below the barcode.
The available barcode types are:
Zebra::Zpl::BarcodeType::CODE_39
Zebra::Zpl::BarcodeType::CODE_93
Zebra::Zpl::BarcodeType::CODE_128_AUTO
Zebra::Zpl::BarcodeType::CODABAR
Zebra::Zpl::BarcodeType::CODE_AZTEC
Zebra::Zpl::BarcodeType::CODE_AZTEC_PARAMS
Zebra::Zpl::BarcodeType::CODE_UPS_MAXICODE
Zebra::Zpl::BarcodeType::CODE_QR
QR Codes:
Using instances of the Zebra::Zpl::Qrcode class or Zebra::Zpl::Barcode class, you can construct elements of QR codes to print. The difference is that if you are creating it using Zebra::Zpl::Barcode then you should have to mention the :type option with the Zebra::Zpl::BarcodeType::CODE_QR option. The following options are accepted:
- position: An array with the coordinates to place the QR code, in dots.
- scale_factor: Crucial variable of the QR codes’s size. Accepted values: 1-99.
- correction_level: Algorithm enables reading damaged QR codes. There are four error correction_levels: L – 7% of codewords can be restored, M – 15% can be restored, Q – 25% can be restored, H – 30% can be restored.
Printing QR codes:
Here is the example for how we can create the label with the QR code element. We will create the QR code element with the help of Zebra::Zpl::Barcode class.
badge_label = Zebra::Zpl::Label.new(
  width:         300,
  length:        300,
  print_speed:   3,
  print_density: 6
)
Now create the element for the QR code,
qrcode = Zebra::Zpl::Barcode.new(
  data: "https://tudip.com",
  position: [50,50],
  height: 100,
  narrow_bar_width: 4,
  wide_bar_width: 8,
  type: Zebra::Zpl::BarcodeType::CODE_QR
)
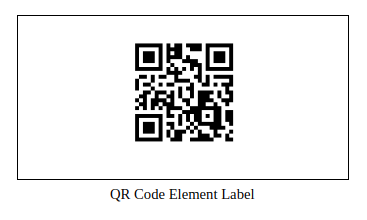
The above label will be printed as follows:
Options
Elements Rotation:
You can rotate all printable elements on the label, using the option: Rotation. The proposed values for rotation are:
- Zebra::Zpl::Rotation::NO_ROTATION: will not rotate the element.
- Zebra::Zpl::Rotation::DEGREES_90: will rotate the element 90 degrees.
- Zebra::Zpl::Rotation::DEGREES_180: will rotate the element 180 degrees.
- Zebra::Zpl::Rotation::DEGREES_270: will rotate the element 270 degrees.
Elements Justification:
There are four ZPL-supported: Justification parameters. “LEFT” (left-justified) is the default.
- Zebra::Zpl::Justification::LEFT – left-justified
- Zebra::Zpl::Justification::RIGHT – right-justified
- Zebra::Zpl::Justification::CENTER – centered
- Zebra::Zpl::Justification::JUSTIFIED – full-width-justifed (YMMV)
For More customization of the Labels and to learn more available options for the Labels, please refer to the following Document:


