22 April 2021
Overview
Google Cloud Platform(GCP) is offered by Google and it is a product of cloud computing services that suddenly spikes in demand for the very framework that Google utilizes inside for its end-user items, for example, Google Search, Gmail, document stockpiling, and YouTube.
Cloud Computing is a shared pool of configurable resources such as networks, servers, storage, applications, and services that customers can use for developing and delivering their products.
In this, We will see how to host and build your web application or website on Google Cloud Platform. Hosting your website on GCP gains you many benefits as it has Cost-Saving services, High Speed, Reliability, and Unlimited Cloud Storage as per the needs.
Table Of Contents
- Create a VM to host your website.
- Install Apache Server in the host virtual machine.
- Build a first web page for your website on GCP
- Configure Cloud DNS for your Website Domain name
- Update the Nameservers in your Domain Provider Panel.
Create a VM to host your website.
Google Cloud has the feature of hosting a secure and reliable website easily, You can do more work at less price with Google Cloud. Virtual Machines are much like our physical hardware machines but we cannot see with our naked eye. It provides the functionality of the physical computer through the cloud and can access via the Internet.
Follow the below steps to create VM for your website.
- Go to Google Cloud Platform Console.
- In Navigation Menu, Click on Compute Engine>>VM Instances
- Now, Click on Create to create a new instance.
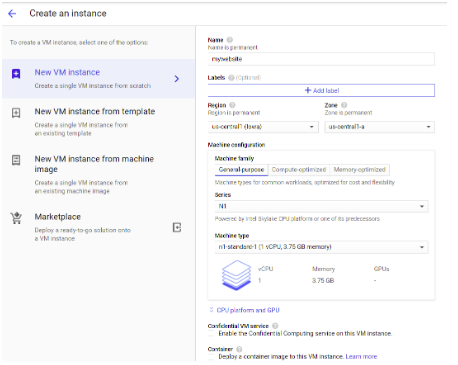
- Enter the name of an instance under the ‘Name’ heading.
- Select Region and Zone nearest to you.
- Select Machine Configuration as per your traffic and requirements. See the below image for better understanding.
- Under the Boot Disk option Select the boot disk you want to use. Here we will use Ubuntu. If you want to change the boot disk then click on change.
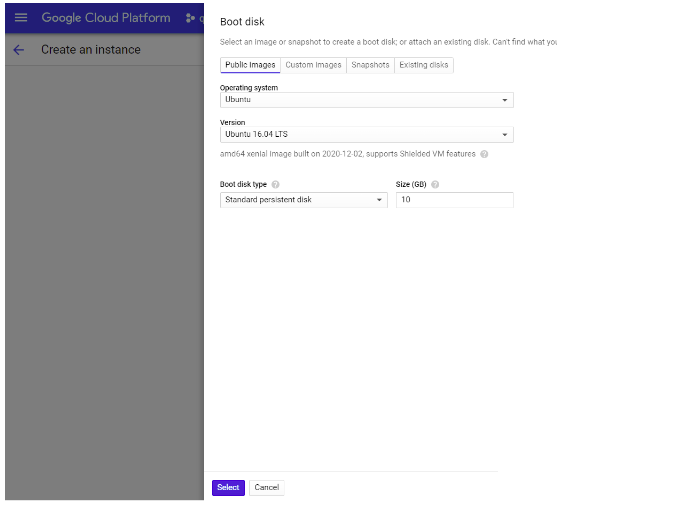
- Click on Select to select the boot disk.
- In the Firewall section, Check on both Allow HTTP traffic and Allow HTTPS traffic.
See image
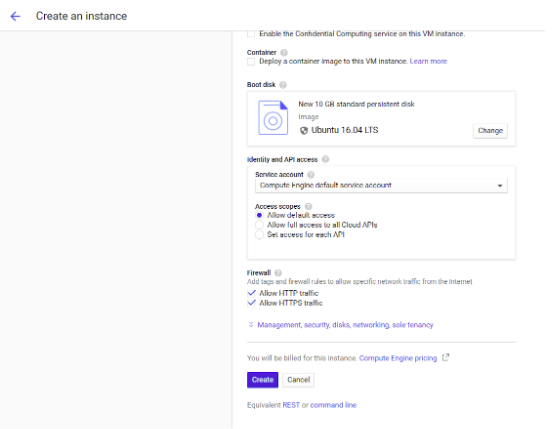
- Click on Create to create the instance.
Install Apache Server in the host virtual machine
- In Navigation Menu, Click on Compute Engine>>VM Instances. You will see a page like this.

- Click on SSH to connect to your VM.
- Wait for the instance to connect.
Run the below commands to install the Apache server in your machine. - $ sudo su
- $ apt-get install apache2
Enter Y if prompted.
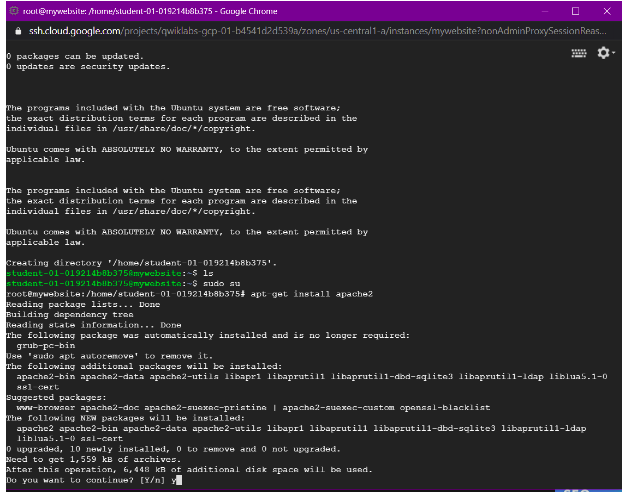
- $ service apache2 status
- You can check whether your server is running by going to the External IP address of the mywebsite VM.
- You will see the below page if your server is running.
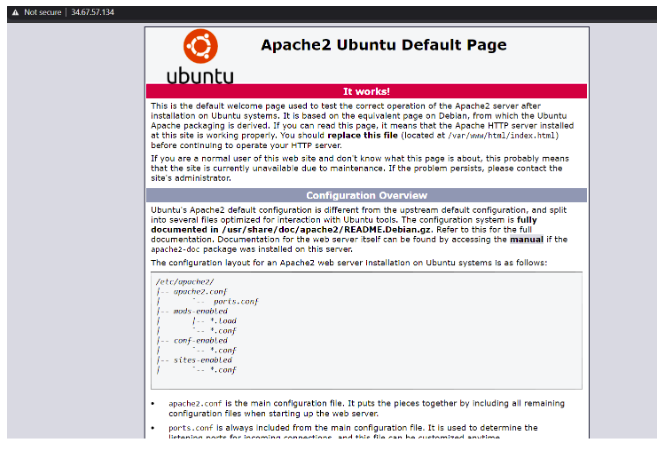
Build a first web page for your website on GCP
After installing the Apache server on your host machine. You will need to modify the index.html web page stored in the /var/www/html folder.
Follow the below steps to create your first default home web page.
- Enter the commands into SSH of your mywebsite VM.
- $ ls /var/www/html
You will see index.html file - $ rm /var/www/html/index.html
To delete the default home web page. - $ vi /var/www/html/index.html
To create a new default home web page. - Enter i on the keyboard to edit the document in vi editor
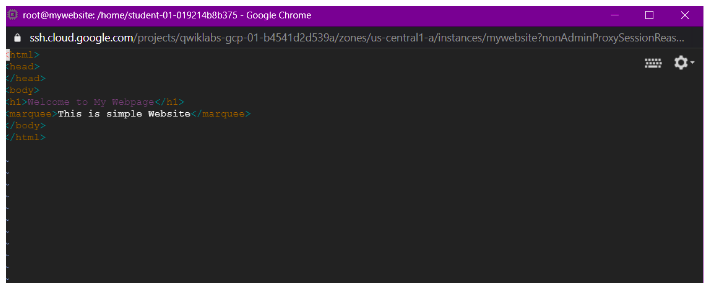
- Create your web page by using HTML
See below commands and image for reference.<html> <head></head <body> <h1>Welcome to My Web Page</h1> <marquee>This is a simple website</marquee> </body> </html>
- Press Esc, Shift+Colon then type wq to save the file.
- Now, Enter command $ service apache2 restart to restart the server.
- Again, Go to the External IP address of the mywebsite VM. Congo, You will see the below page.
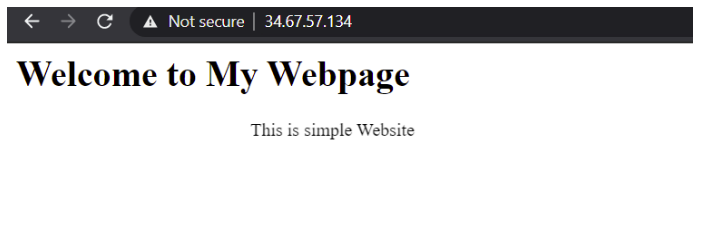
Configure Cloud DNS for your Website Domain name
- Get back to Navigation Menu,
Click on Network Services>>Cloud DNS
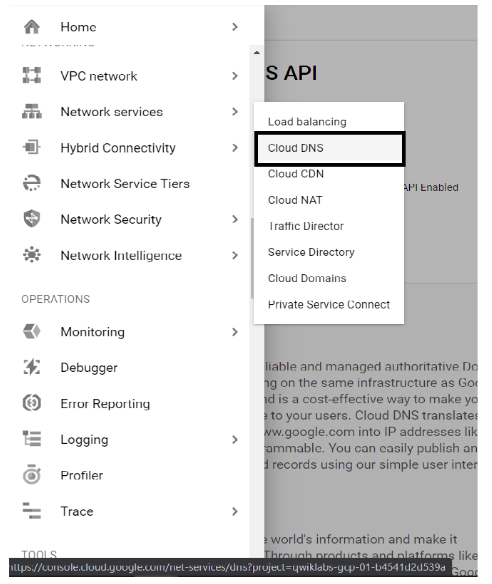
- Click on CREATE ZONE
- Enter zone name under Zone name field
- Under DNS name, Enter your website domain name that you want to host and build in GCP.
- Provide description if applicable(Optional)
- See the below image for reference
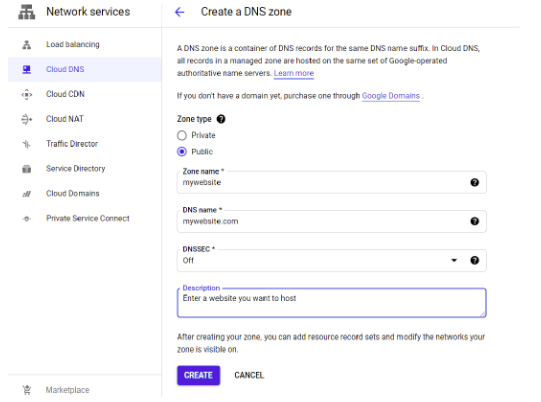
- Click on the Create button.
- Now, Click on the Add Record Set button
- Select Record Reference Type as A
And under IPv4 Address Enter the External IP address of the mywebsite VM Instance.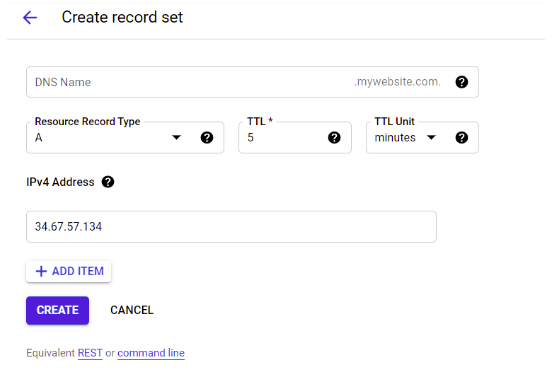
- Again, click on the Add Record Set button
- Select Record Reference Type as CNAME.
Enter www into DNS Name and [your domain website name] into Canonical name.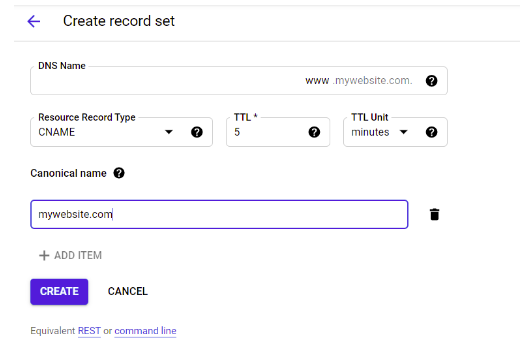
- Click on Create.
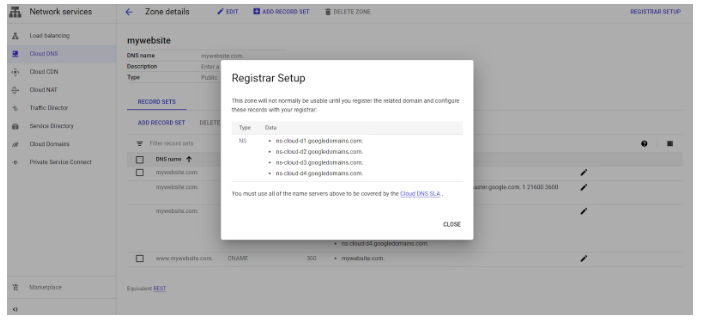
- Bingo, Now click on Registrar Setup on the top-right side.
And note down the nameservers on the notepad for future use. You will use these nameservers to point your domain to Google Cloud for hosting.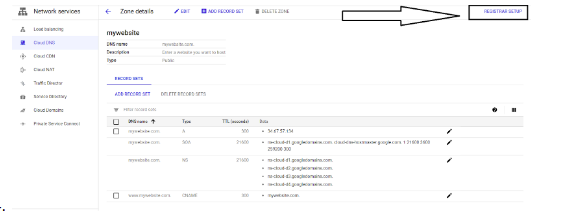
Update the Nameservers in your Domain Provider Panel
- Go to your domain provider website like Godaddy, Bigrock, etc
- Navigate to the DNS Management page of your domain.
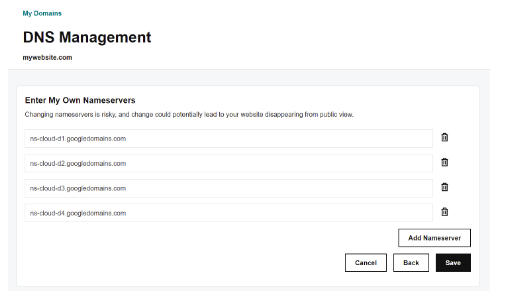
- Update your nameservers into these fields which you have noted before.
Now, It will take approximately 24-48 hours to fully update the nameservers.
Congo, You have successfully hosted your website on Google Cloud Platform. You can install a database and other services to build or upgrade your website.


