How to Setup Custom Domain for Google App Engine Application?
How to Setup Custom Domain for Google App Engine Application?
Google’s App Engine is a Platform as a Service (PaaS) that provides features and web frameworks to easily build scalable web applications. App Engine applications are easy to manage your traffic and data storage as per need.
Anyone can create applications and deploy them to the Google App Engine. As a web application is created using the App Engine, the application is assigned with a unique project ID. We can choose a default generated project ID or create a custom one. The URL to access the app engine application will be like “<project-id>.appspot.com”. For example, if the project ID is test123, then the URL will be https://test123.appspot.com/
However, this sort of domain name may create multiple security issues. In place of the appspot.com default address, you can serve your application with your own domain name (such as http://www.mydomain.com/). You can do a domain mapping for your App Engine application so that it will use a custom domain.
So, let’s start with mapping app engine application via a custom domain.
Before you begin, ensure that you have a domain name which you want to use. If you don’t have one, then purchase a new domain. You can purchase any domain name registrar, including Google Domains.
Follow the steps given below:
- Log in to the Google Cloud Platform Console.
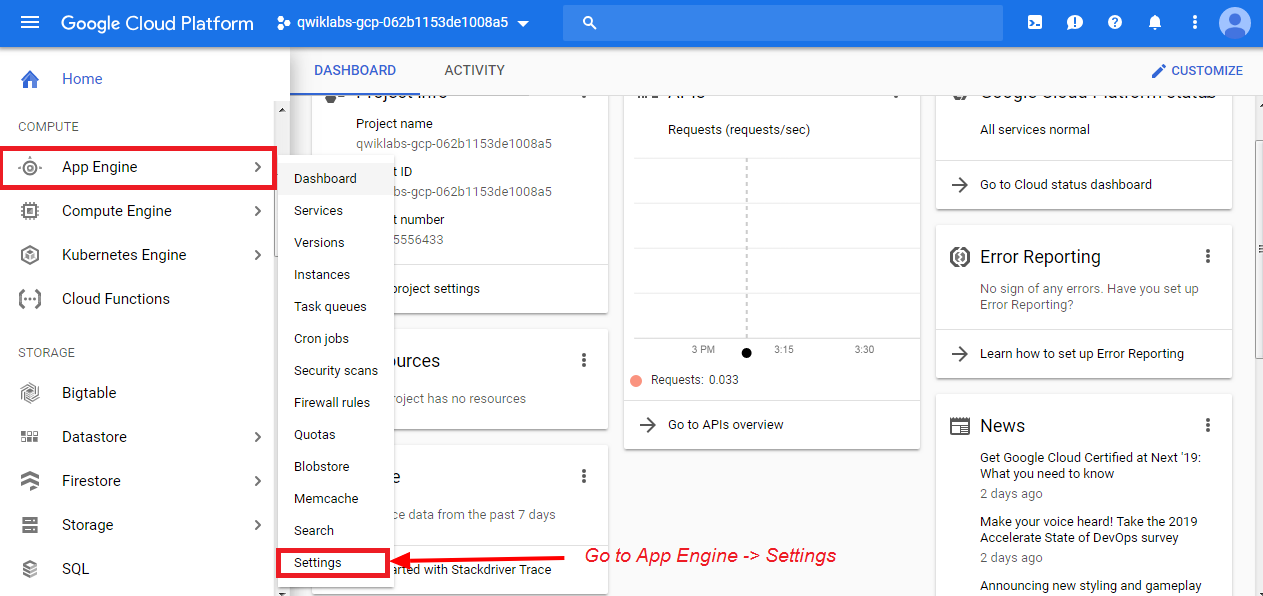
- Navigate to App Engine -> Settings


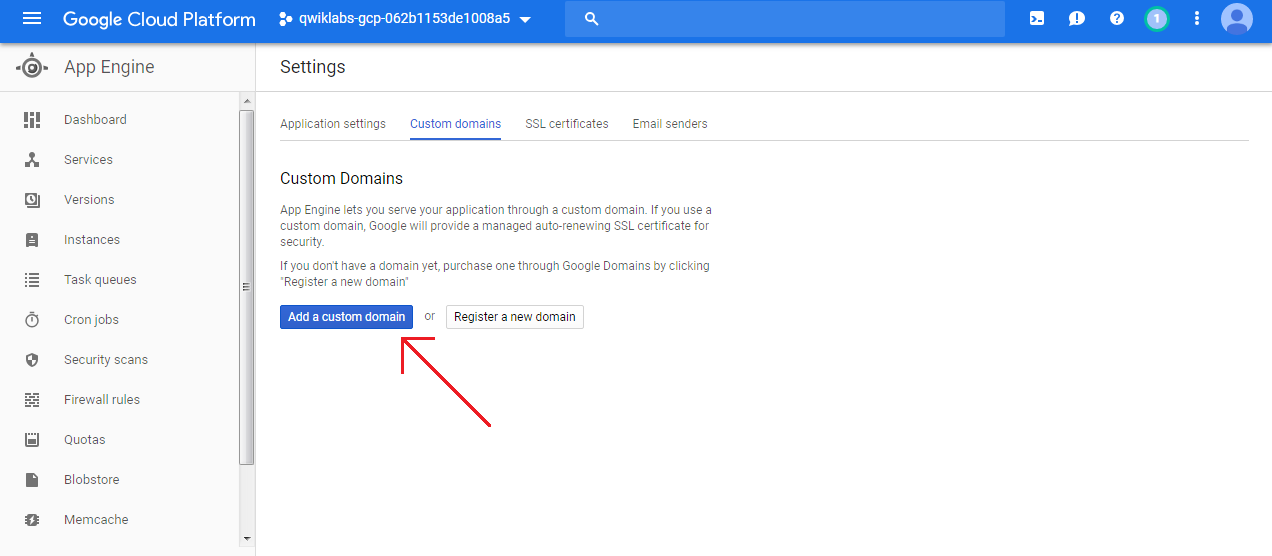
- Navigate to the “Custom Domains” tab and then click on “Add a custom domain”. If you do not have a custom domain name yet, purchase one from a domain name by clicking on “Register a new domain”.


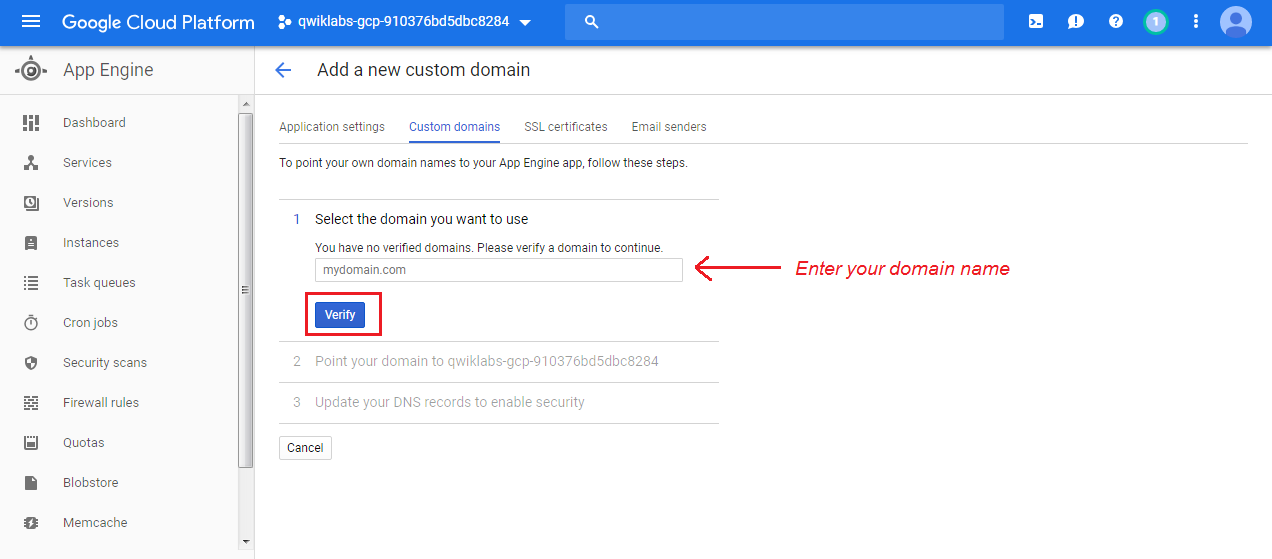
- Enter your custom domain name in the text box “Select the domain you want to use” as shown in the following screenshot. Then, click on the “Verify” button and perform the steps to verify that you own that custom domain.


- Make sure that your domain has been verified successfully. If not, you will not be able to proceed further.
- After verifying the domain, return to Google Cloud Platform (GCP) Console.
- Choose the application for which you want to assign this custom domain name and then click “Save mappings”.
- After this, you will see the DNS records. Please go to your domain registrar website and update the noted DNS records in your DNS configuration. It may take some time for updating the records.
Congratulations! We have done with mapping app engine application via a new custom domain.
Check your app by browsing it via new domain URL, for example, www.mydomain.com To know more about these you can always go to Google Doc.


