Easy way to setup your AWS EC2 Instance
Easy way to setup your AWS EC2 Instance
13 October 2021
What is EC2 Instance?
- It is a Computing resource that provides a virtual computing environment to deploy your application
- In short, you can create a server on AWS and deploy your application on that server.
Why Use Amazon EC2?
- No need for H/W, Develop and deploy the application faster.
- Pay only for that you use
- Auto scaling as per the workload.
- Complete control of servers
- Built-in security
EC2 Instance Types
- General Purpose EC2 Instance
-
- This type of instance is the most commonly utilised for testing. There are two types of general-purpose instances: “T” and “M.”
- “T” instances are targeted to simple jobs just like testing environments, and they have a modest networking on the most basic options.
- “M” Instances are for general use when you don’t want a testing environment, but you want an all-purpose instance. They offer more balanced resources compared to “T” instance
- Compute Optimized
-
- If your application requires to process a lot of information like math operations, load balancing, rendering task or sometimes video encoding
- You need an instance that can process all that information in less time
- Memory Optimized
-
- If your app doesn’t require too much CPU, but instead, it needs more and faster RAM; you should check out the available option on the “X1e, X1 and R” instances.
- Accelerated Computing
-
- Creating a movie and need to render the textures? Need to design with power? Or you just have money to spend and want to play games on streaming?
- Storage Optimized
-
- This Kind of instances are provisioned with a more significant amount of TB for storage
- You are going to have the best I/O Performance. These instances are a great option for those databases that need to be writing regularly on the disk, here we have three groups of instances: H, I and D.
Creating an EC2 instance
- Sign in to the AWS Management Console.
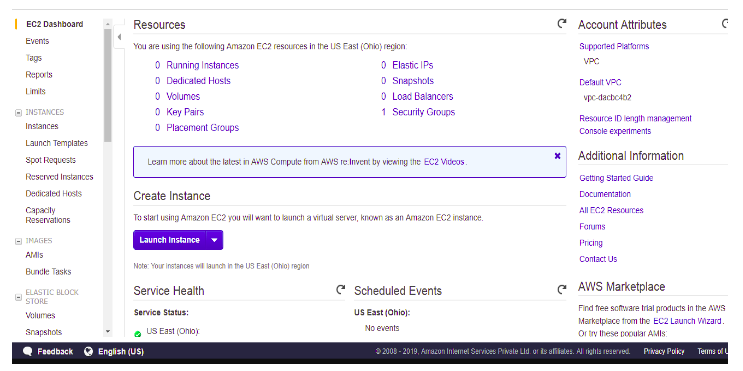
- Click on the EC2 service.
- Click on the Launch Instance button to create a new instance.
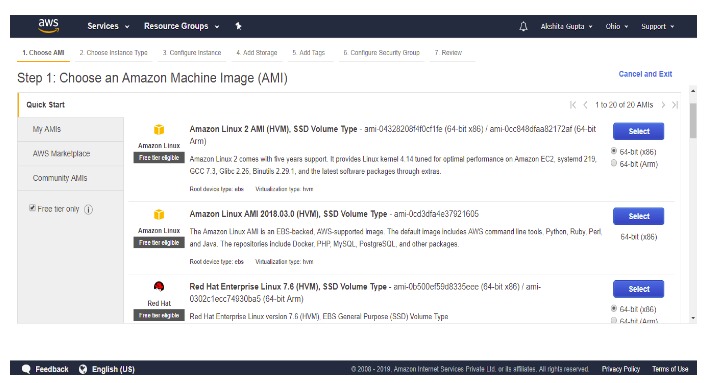
- Choose AMI: (Amazon Machine Image) AMI is a template used to create the EC2 instance.

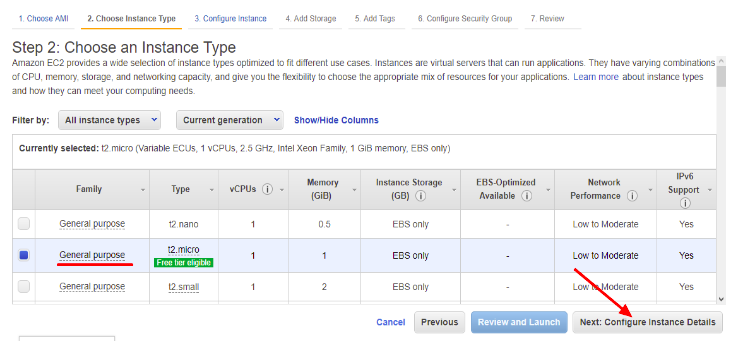
- Choose Instance Type and then click on the Next. Suppose I choose a t2.micro as an instance type for testing purpose

- The main setup page of EC2 is shown below where we define setup configuration

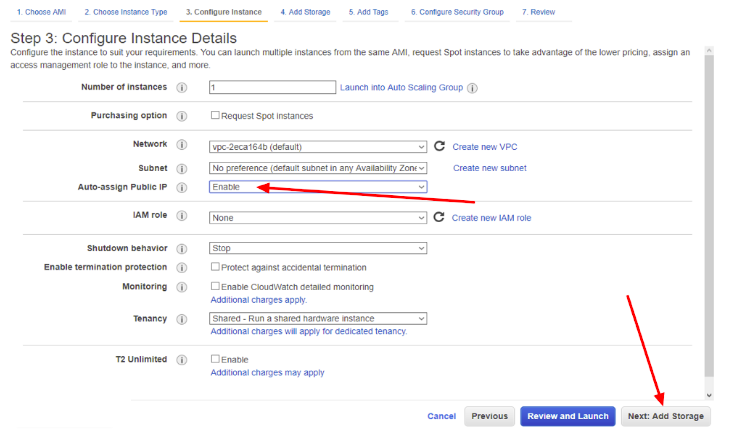
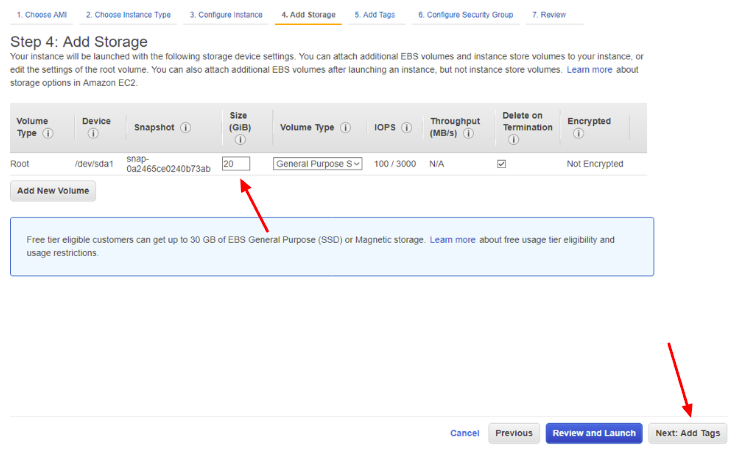
- Never leave the default 8gb, if you want to be on the free tier limits you can set a value around 20gb -24gb, because sometimes you leave it as default and your instance is not going to have too many spaces to do many things, and click next

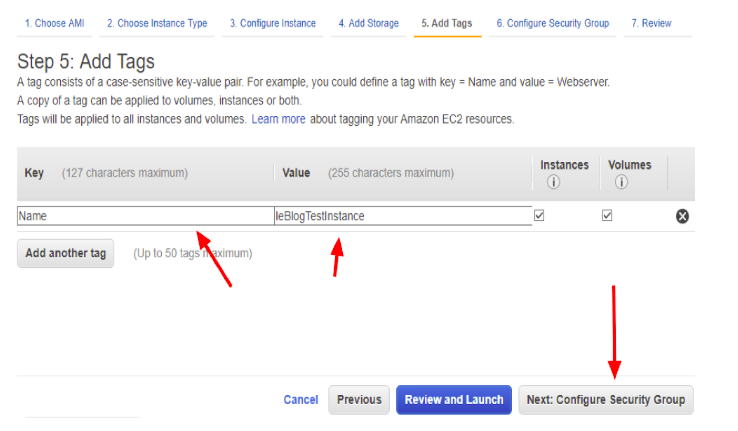
- Now, Add the Tags and then click on the Next.

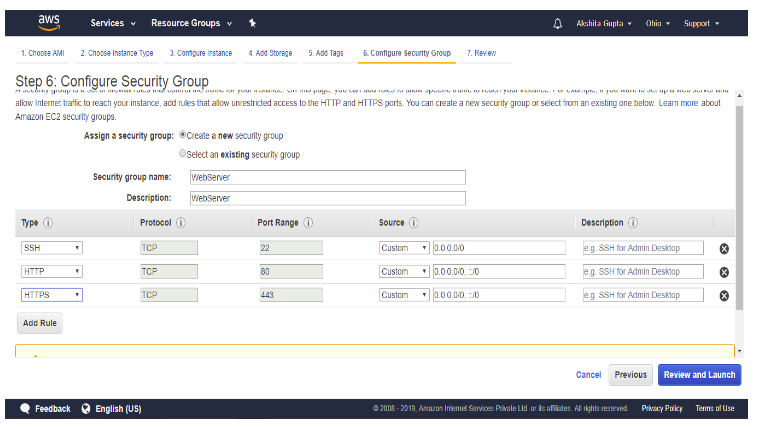
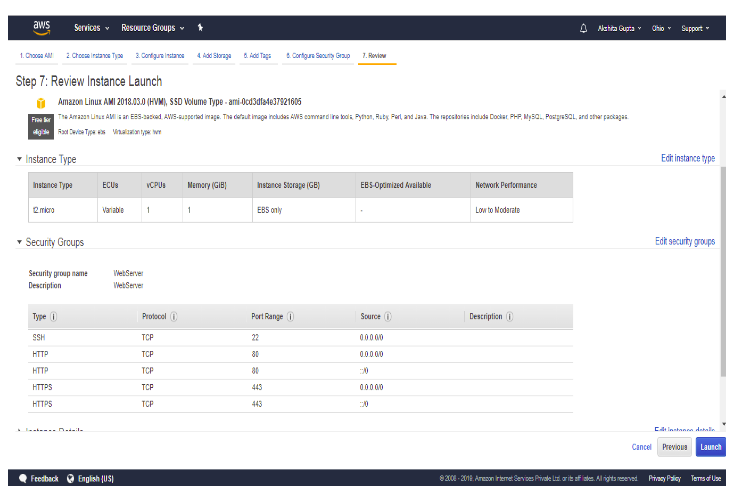
- Configure Security Group. The security group allows some specific traffic to access your instance. i.e. If you want to have a web server you need to open port 80. If you want ssh access you need port 22, so let’s create a new one.

- Review an EC2 instance that you have just configured, and then click on the Launch button.

- Create a new key pair and enter the name of the key pair. Download the Key pair.

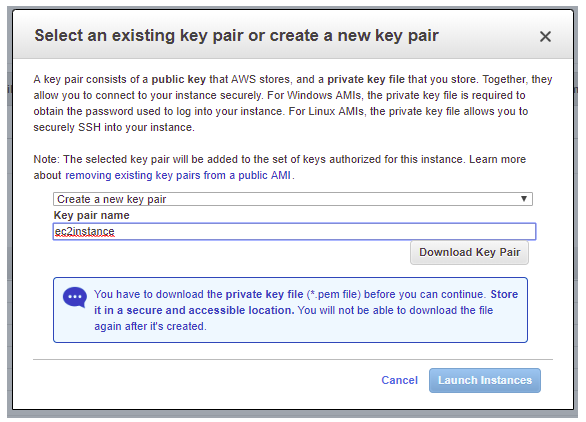
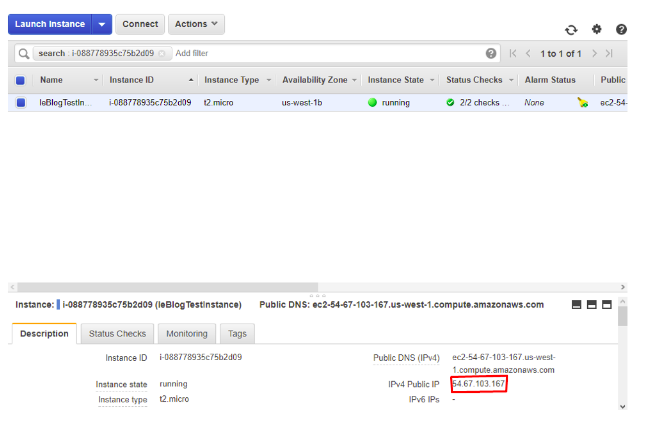
- Click on the Launch Instances button.

