Custom payment form using Stripe elements?
Custom payment form using Stripe elements?
04 October 2021
In this blog, we’ll see the way to use the Stripe element to build custom payment forms in Asp.Net.
Introduction to Stripe Element
Stripe Elements is a predefined UI component which can be used to create a custom payment form that will gather a customer’s card details without handling the sensitive data in a secure way.
The provided card details are converted to a card token by stripe element that you can safely send to your servers.
You can use that stripe card token to create a charge for payment.
How to start?
Following is the library used to create custom payment form:
- Stripe.js
It’s a JavaScript library for allowing users to build payment forms. It includes Stripe Elements, which allows you to collect card data using customized UI components.
Using this library tokenization of card information is done and all card data is handled by Stripe.js only. Thus it gives you a simple PCI compliance feature.
What are Stripe Elements?
Stripe Elements are set of predefined UI components which includes inputs and buttons, for building custom payment form flow. Stripe.js tokenizes the card data within an Element without touching to the server.
Stripe Elements includes features:
- It formats card information automatically as information is entered.
- It translates placeholders into the customer’s preferred language.
- It provides a responsive design to fit the width of the customer’s device.
- It customizes the styling to match the look of your checkout flow.
How to set up Stripe.js?
Step 1:
In the payment form page add Stripe.js library by adding the script tag to the head of your HTML file.
Step 2:
After including Stripe.js library, create an instance of the Stripe object by mentioning theStripe publishable API key as the parameter.


Step 3:
Create your payment form:
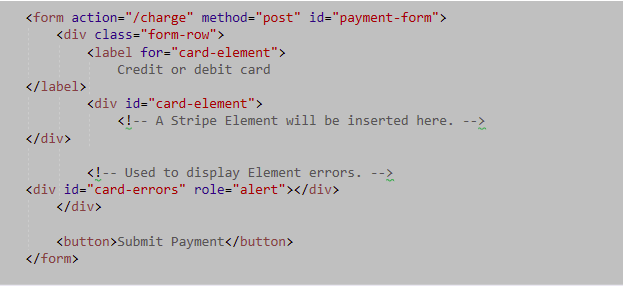
Once Stripe Elements gets loaded, include one DOM with a unique ID within the payment form where we need to give input fields for the elements. Add that dom near to the label tag with a for attribute that matches with the container unique ID. Because of this the element automatically gets focus when the customer clicks on the label.


Step 4:
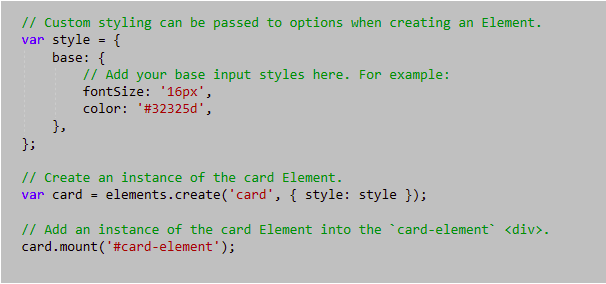
Once the form is loaded, create an object of a card Element and map it to the Element container created in the above image.
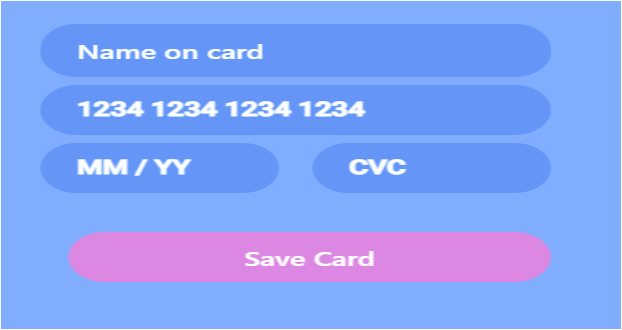
The card Element creates the form in the easiest way and reduces the number of required fields by inserting a single, flexible input field that securely collects necessary card details of the customer.
You can also card number, card expiry, and card cvc Elements for the multi-input card form.

Step 5:
Create a token:
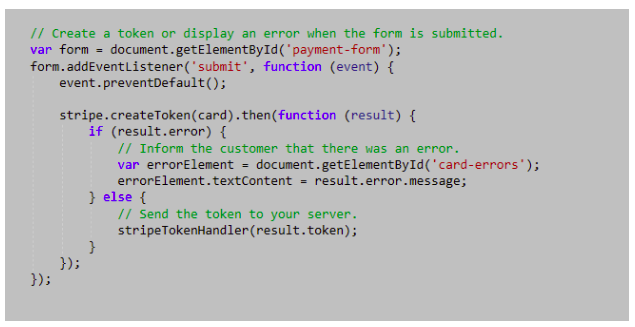
When a customer submits their card data add an event listener and to generate a token for the card data use stripe.createToken(card).

Step 6:
createToken class also accepts a second parameter containing additional card data of the customer. A Promise is returned by this function which will give you a result object. This object will have:
result.token: A token was generated successfully.
result.error: There was an error while generating the token. This can include client-side validation errors.
If Promise returns result.token then pass this token to your server otherwise show the customer an error.
Step 7:
Pass the token to your server along with any extra information that has been collected from the customer.
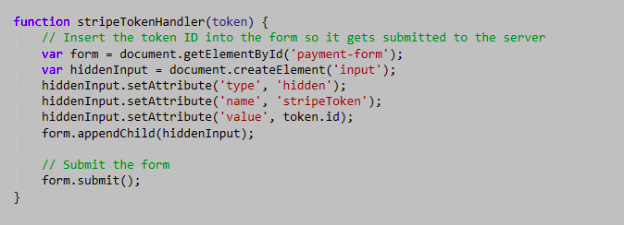

Step 8:
After passing the token to your server, you can use it to create a payment. On the server, fetch the Stripe token in the POST parameters submitted by the payment form. After that call the Stripe charge API to generate the payment.
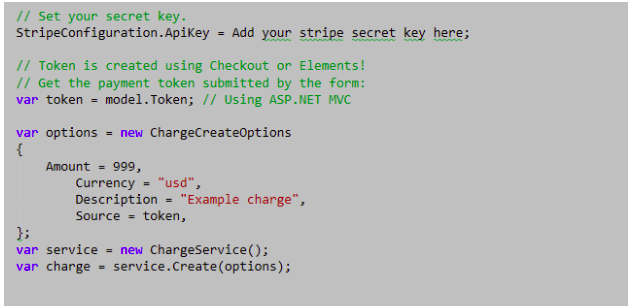

Step 9:
The response from the stripe charge method will either be a charge generated successfully or an error with an error code. If the response succeeds, display the customer a success page or show the customer an error page.


